Home Graphic Photoshop How to Create a Before/After Animated GIF

How to Create a Before/After Animated GIF

Our #1 PRO Tutorial ever is now on Sale! https://phlearn.com/rtyoutube

How to Create a Before/After Animated GIF

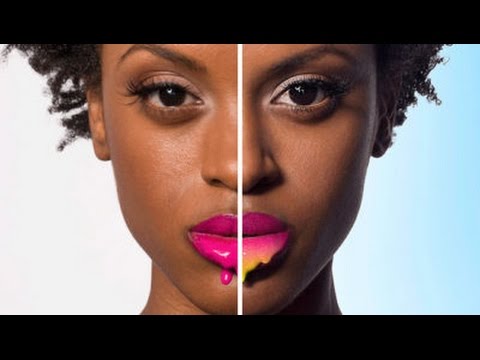
Before/After images are a great way to show off your editing work. Learn how to create a simple animated GIF from any image in Photoshop!

How to Make Before and After Layers

The first step to creating an animated GIF is to get the “Before” and “After” images. In many cases, the “Before” image will be an unedited photo. This will most likely be the background layer of any Photoshop file.

Each change you make to an image should be on a new layer, allowing for changes to be undone at any time. After adding many layers and adjustments to an image, you are left with the “After” version. You will need all these changes to be visible on a single layer to make the “After” Layer.

Create a new layer on the top of the document and navigate to ‘Image – Apply Image’. Choose “Merged”, “Multiply”, and make sure “Invert” is not checked. This will place a copy of your image onto one layer.

This is the “After” Layer.

Duplicate Layers to New Document

After creating the “After” layer, it is time to duplicate the “Before” and “After” layers onto a new document.

Create a new document sized for the web. Image resolution will depend on where this image will live. For instance, if you want this image on Instagram, try a resolution of 1000x1000px.

After creating a new document, select both the “Before” and “After” layers from the original image and Click+Drag them to the new document. Be sure to select both layers when making any adjustments, as you need them to be in the same place.

It is a good idea to turn both the “Before” and “After” layers into Smart Objects before transforming them in the new document. This will allow you to change image size without affecting quality. To turn the layers into Smart Objects, Right-Click on each layer and go to “Convert to Smart Object”.

Select Both layers and transform them into place.

How to Create a Before & After Animation

Now that both the “Before” and “After” layers are sized correctly on the new document, it is time to create a simple animation. Go to “Window – Timeline” to open the animation timeline and click on “Create New Frame Animation”.

Use the “New Frame” icon to make frames from the “Before” and “After” layers. Choose the frame duration and how many times the animation will repeat. In this example, we choose “3 Seconds” and “Forever”.

Be sure to hit the “Play” button to view the animation in the timeline.

Exporting for the Web

After the animation is playing well, it is time to export it to the web. Go to ‘File – Export – Save for Web’ and choose GIF from the drop-down menu.

Be sure to check the animation on the right side of the export panel to see if it is still playing well. When you are satisfied with all the export settings, click the “Export” button and choose a destination folder.

To view the final “Before & After” Animated GIF online, upload it to the desired website or open the image in Google Chrome, Safari or Firefox.

You are ready to show your work off to the world!

VISIT PHLEARN.COM FOR MORE FREE TUTORIALS

Homepage

SUBSCRIBE NOW FOR MORE FREE TIPS AND TRICKS
http://www.youtube.com/subscription_center?add_user=phlearnllc

GET FREE TUTORIALS SENT TO YOUR EMAIL + DISCOUNTS ON OUR PRO TUTORIALS!
https://phlearn.com/mail

LET’S BE FRIENDS!
Instagram ► https://www.instagram.com/phlearn/
Facebook ► https://facebook.com/phlearn
Twitter ► https://twitter.com/phlearn
Google+ ► https://plus.google.com/11679109

Comments

comments

Latest articles

Easy Ways to Select Artwork in Illustrator | Adobe Creative Cloud

Explore a variety of methods for making selections in your projects to make creating and editing faster and easier in Adobe Illustrator. To download the sample files and learn more about Artwork selection methods, click on https://adobe.ly/2AXMTv1 Subscribe: https://www.youtube.com/user/adobecreativecloud?sub_confirmation=1 LET’S CONNECT Facebook: http://facebook.com/adobecreativecloud Twitter: http://twitter.com/creativecloud Instagram: http://www.instagram.com/adobecreativecloud/ Adobe Creative Cloud gives you the world's best creative apps so you can turn your brightest ideas into your greatest work across your desktop and mobile devices.

Transform Artwork Freely in Illustrator Using Puppet Warp | Adobe Creative Cloud

Learn how to transform artwork using the Puppet Warp and Free Transform tools in Adobe Illustrator. To download the sample files and explore more tutorials on Artwork selection in Illustrator, go to https://adobe.ly/2vul87Y Subscribe: https://www.youtube.com/user/adobecreativecloud?sub_confirmation=1 LET’S CONNECT Facebook: http://facebook.com/adobecreativecloud Twitter: http://twitter.com/creativecloud Instagram: http://www.instagram.com/adobecreativecloud/ Adobe Creative Cloud gives you the world's best creative apps so you can turn your brightest ideas into your greatest work across your desktop and mobile devices.

How to Make a Custom Brush with Adobe Capture CC | Adobe Creative Cloud

Create a brush from a simple sketch. Start from scratch, or download practice files [https://learndownload.adobe.com/pub/learn/mobile-apps/make-a-custom-brush.zip] for a head start. Steps below. Prep your project: 1. Save the practice image (source-image.jpg) provided here to the Camera Roll on your mobile device, or use your own. 2. Download the Adobe Capture CC mobile app from the App Store for your iOS device, or from the Play Store for you Android. Open the app and sign in with your Adobe ID. 3. Tap Brushes from the top menu. Create a custom brush: 1. Tap Brushes from the menu. 2. Tap the image icon at the bottom, then tap Camera Roll. 3. Choose an image from your Camera Roll. 4. Tap areas to erase unwanted marks. Tap the checkmark. 5. Drag the resize handles (white dots) to position the blue box around the part of the image you want to use as the brush. 6. Tap Styles from the main menu. Tip: For the example in the video, we chose a style in the Photoshop CC & Adobe Sketch Brushes section. 7. Tap Presets. Adjust the Size, Spacing, and other settings as you like. Tap Done, or the right arrow on Android devices. 8. Choose the appropriate Creative Cloud Library. Tap Save. Apply style in Adobe Photoshop CC: 1. Open artwork in Photoshop. 2. Choose the Brush tool. 3. Choose your new brush from the Libraries panel (Window – Libraries). 4. Use the new brush to enhance your creation. That's it! To learn more about Adobe Capture and Adobe's other mobile apps, visit our Mobile apps Tutorials page. Subscribe: https://www.youtube.com/user/adobecreativecloud?sub_confirmation=1 LET’S CONNECT Facebook: http://facebook.com/adobecreativecloud Twitter: http://twitter.com/creativecloud Instagram: http://www.instagram.com/adobecreativecloud/ Adobe Creative Cloud gives you the world's best creative apps so you can turn your brightest ideas into your greatest work across your desktop and mobile devices.

Bring Dull Photos to Life Using Lightroom CC | Adobe Creative Cloud

Learn how to enhance sharpness, detail, and textures using Clarity and Dehaze sliders in Lightroom CC. Download sample files and learn more about image editing techniques in Lightroom: https://adobe.ly/2wbDUS0 Subscribe: https://www.youtube.com/user/adobecreativecloud?sub_confirmation=1 LET’S CONNECT Facebook: http://facebook.com/adobecreativecloud Twitter: http://twitter.com/creativecloud Instagram: http://www.instagram.com/adobecreativecloud/ Adobe Creative Cloud gives you the world's best creative apps so you can turn your brightest ideas into your greatest work across your desktop and mobile devices.

Comments

comments