Home Blog Page 2

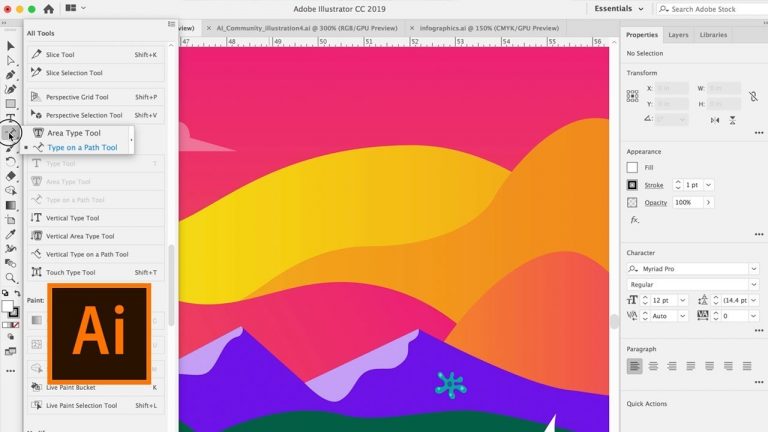
Illustrator CC Sneak Peek: Custom Toolbar | Adobe Creative Cloud

Coming soon to Illustrator CC — Custom Toolbar. You can add, remove, or group tools in your Illustrator toolbar to fit your workflow. Learn more: https://adobe.ly/2DdfDBa

Subscribe: https://www.youtube.com/user/adobecreativecloud?sub_confirmation=1

LET’S CONNECT
Facebook: http://facebook.com/adobecreativecloud
Twitter: http://twitter.com/creativecloud
Instagram: http://www.instagram.com/adobecreativecloud/

Adobe Creative Cloud gives you the world’s best creative apps so you can turn your brightest ideas into your greatest work across your desktop and mobile devices.
Make Natural Color Adjustments in Premiere Pro | Adobe Creative Cloud

Use the Lumetri Color panel Adjustments controls in Premiere Pro CC to add vibrant color to your shots while protecting natural skin tones, or sharpen the image and flatten the colors to subtly change the appearance of your footage. Download sample files: https://adobe.ly/2PH1JIE

Subscribe: https://www.youtube.com/user/adobecreativecloud?sub_confirmation=1

LET’S CONNECT
Facebook: http://facebook.com/adobecreativecloud
Twitter: http://twitter.com/creativecloud
Instagram: http://www.instagram.com/adobecreativecloud/

Adobe Creative Cloud gives you the world’s best creative apps so you can turn your brightest ideas into your greatest work across your desktop and mobile devices.

How to Make a VHS Glitch in Premiere Pro | Adobe Creative Cloud

Give your digital video some analog noise with a VHS effect.

Start from scratch, or download practice files [https://learndownload.adobe.com/pub/learn/premiere/make-a-vhs-tape.zip] for a head start. Steps below.

Prep your project:

1. Create a new project in Premiere Pro (File – New – Project). Click OK.
2. Import the video clip included in the zipped practice file (File – Import).
3. Right-click the video clip in the Project panel and choose “New Sequence From Clip.”

Tip: Make sure you are in the Editing workspace (Window – Workspaces – Editing).

4. Click New Item from the Project panel, choose Adjustment Layer, click OK, and drag the Adjustment Layer from the Project panel to the timeline above the video clip. Drag the Adjustment Layer so it is the same length as the video clip.

Apply glitchy effects:

1. Switch to the Effects workspace (Window – Workspaces – Effects).
2. Search for Channel blur in the Effects panel. Drag the effect on to the Adjustment Layer in the timeline. Update the values for the Channel blur effect in the Effects Controls panel.

Here are the values we used:

– Red Blurriness: 40.0
– Blue Blurriness: 20.0
– Edge Behavior: Repeat Edge Pixels is checked

3. Search for Noise in the Effects panel. Drag the effect on to the Adjustment Layer. Update the values for the effect.

Here are the values we used:

– Amount of Noise: 15.0%

4. Click Play to preview the effect in the preview panel.
5. Search for Wave Warp in the Effects panel. Drag the effect on to the Adjustment Layer. Update the values for the effect.

Here are the values we used:

– Wave Type: Square
– Wave Height: 20
– Wave Width: 650
– Direction: 0.0
– Wave Speed: -0.1
– Pinning: All Edges

Preview your movie:

1. Click Play to preview the effects you apply as you work on your project.

That’s it! Play your sequence to see the complete movie title.

Subscribe: https://www.youtube.com/user/adobecreativecloud?sub_confirmation=1

LET’S CONNECT
Facebook: http://facebook.com/adobecreativecloud
Twitter: http://twitter.com/creativecloud
Instagram: http://www.instagram.com/adobecreativecloud/

Adobe Creative Cloud gives you the world’s best creative apps so you can turn your brightest ideas into your greatest work across your desktop and mobile devices.
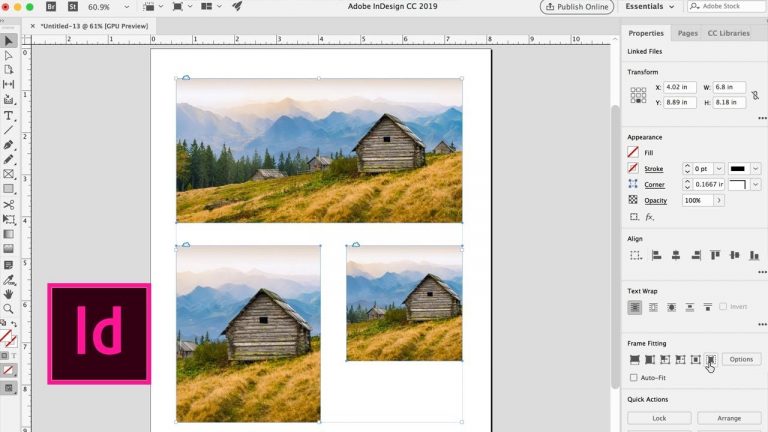
InDesign CC Sneak Peek: Content-Aware Fit | Adobe Creative Cloud

0

We’re excited to share another sneak with you! With the next release of InDesign CC you can intelligently fit images into frames with Content-Aware Fit. Learn more about this time-saving feature powered by Adobe Sensei: https://adobe.ly/2xDLcP6

Subscribe: https://www.youtube.com/user/adobecreativecloud?sub_confirmation=1

LET’S CONNECT
Facebook: http://facebook.com/adobecreativecloud
Twitter: http://twitter.com/creativecloud
Instagram: http://www.instagram.com/adobecreativecloud/

Adobe Creative Cloud gives you the world’s best creative apps so you can turn your brightest ideas into your greatest work across your desktop and mobile devices.
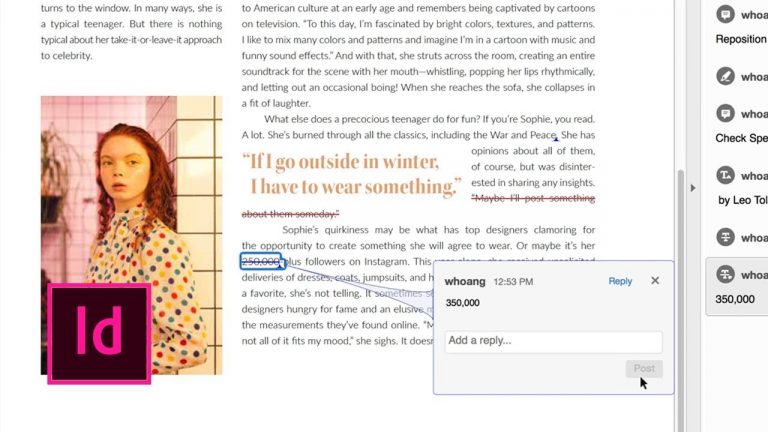
InDesign CC Sneak Peek: Import PDF Comments | Adobe Creative Cloud

0

In the next release of InDesign CC, you can import marked-up PDFs and easily track the feedback and comments noted in the PDF files.

Subscribe: https://www.youtube.com/user/adobecreativecloud?sub_confirmation=1

LET’S CONNECT
Facebook: http://facebook.com/adobecreativecloud
Twitter: http://twitter.com/creativecloud
Instagram: http://www.instagram.com/adobecreativecloud/

Adobe Creative Cloud gives you the world’s best creative apps so you can turn your brightest ideas into your greatest work across your desktop and mobile devices.
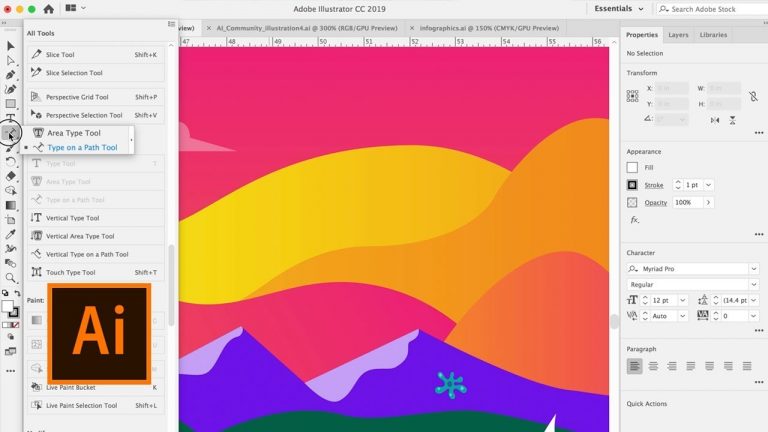
Illustrator CC – Custom Toolbar (October 2018) | Adobe Creative Cloud

In the latest release of Illustrator CC, you can add, remove, or group tools in your Illustrator toolbar to fit your workflow with Custom Toolbar.

Subscribe: https://www.youtube.com/user/adobecreativecloud?sub_confirmation=1

LET’S CONNECT
Facebook: http://facebook.com/adobecreativecloud
Twitter: http://twitter.com/creativecloud
Instagram: http://www.instagram.com/adobecreativecloud/

Adobe Creative Cloud gives you the world’s best creative apps so you can turn your brightest ideas into your greatest work across your desktop and mobile devices.
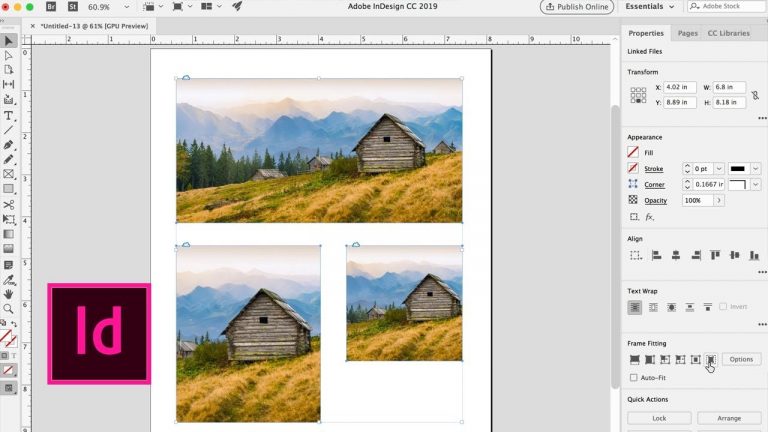
InDesign CC – Content-Aware Fit (October 2018) | Adobe Creative Cloud

0

In the newest release of InDesign CC, you can intelligently fit images into frames with Content-Aware Fit.

Subscribe: https://www.youtube.com/user/adobecreativecloud?sub_confirmation=1

LET’S CONNECT
Facebook: http://facebook.com/adobecreativecloud
Twitter: http://twitter.com/creativecloud
Instagram: http://www.instagram.com/adobecreativecloud/

Adobe Creative Cloud gives you the world’s best creative apps so you can turn your brightest ideas into your greatest work across your desktop and mobile devices.
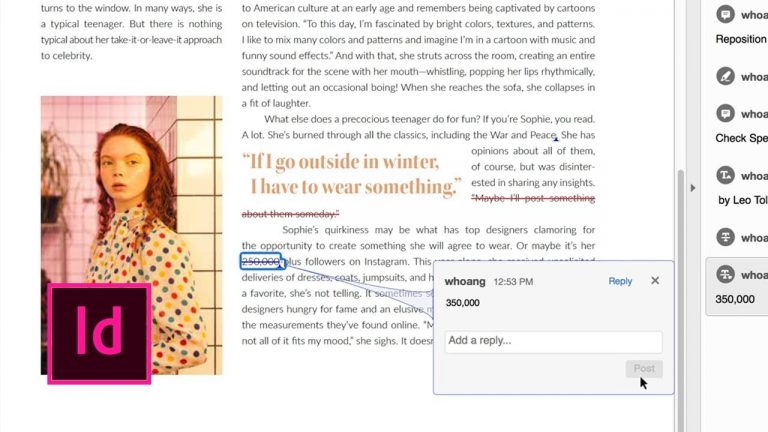
InDesign CC – Import PDF Comments (October 2018) | Adobe Creative Cloud

0

In the newest release of InDesign CC, you can import marked-up PDFs and easily track the feedback and comments noted in the PDF files.

Subscribe: https://www.youtube.com/user/adobecreativecloud?sub_confirmation=1

LET’S CONNECT
Facebook: http://facebook.com/adobecreativecloud
Twitter: http://twitter.com/creativecloud
Instagram: http://www.instagram.com/adobecreativecloud/

Adobe Creative Cloud gives you the world’s best creative apps so you can turn your brightest ideas into your greatest work across your desktop and mobile devices.

How to Make Mezzotint Grain with Adobe Illustrator | Adobe Creative Cloud

Apply a grainy texture to give your drawing shades of light and dark.

Start from scratch, or download practice files [https://learndownload.adobe.com/pub/learn/illustrator/make-mezzotint-grain.zip] for a head start. Steps below.

1. Open your drawing, or use ours (make-mezzotint-grain_download.ai).
2. Choose the Selection Tool and select the moon in the artwork.
3. Open the Appearance panel (Window – Appearance). Click the Fill layer, then click Duplicate Selected Item at the bottom of the panel. Drag the new Fill layer above the Stroke layer.
4. Apply a gradient: Click the new Fill layer, then click the down arrow and choose the White, Black gradient swatch.
5. Adjust the gradient properties: Open the Gradient panel (Window – Gradient) and double-click the Black Gradient Slider below the gradient preview. Select a new color (e.g., red-orange) and set the Angle (e.g., 90 degrees).

Tip: Click the Swatches icon (grid) below the Color palette (easel icon) to show the color swatches.

6. Double-click the white Gradient Slider in the Gradient panel, change its Opacity to 0%.
7. Apply a grain effect: Choose the gradient Fill layer. Click the fx icon in the Appearance panel. Choose Texture, then Grain to adjust the grain in a new workspace. Increase the Intensity and Contrast and experiment with the Grain Types. Click OK.

Tip: We liked 75 for Intensity and Contrast and Enlarged for Grain Type.

8. Expand the gradient Fill layer. Click the Opacity label and select Multiply.
9. Reuse the new style: Choose Window – Graphic Styles. Click New Graphic Style to add the new grain effect. Click another part of the drawing and click the style you just added to apply the effect to another part of the drawing.

That’s it!

To learn more, visit our Illustrator Tutorials page.

Subscribe: https://www.youtube.com/user/adobecreativecloud?sub_confirmation=1

LET’S CONNECT
Facebook: http://facebook.com/adobecreativecloud
Twitter: http://twitter.com/creativecloud
Instagram: http://www.instagram.com/adobecreativecloud/

Adobe Creative Cloud gives you the world’s best creative apps so you can turn your brightest ideas into your greatest work across your desktop and mobile devices.

Fossil + Adobe Dimension | Adobe Creative Cloud

0

Fashion brand Fossil visualizes its iconic tin packaging in a unique way with Adobe Dimension. https://adobe.ly/2O693g0

Learn more about Adobe Dimension: https://www.adobe.com/products/dimension.html

Subscribe: https://www.youtube.com/user/adobecreativecloud?sub_confirmation=1

LET’S CONNECT
Facebook: http://facebook.com/adobecreativecloud
Twitter: http://twitter.com/creativecloud
Instagram: http://www.instagram.com/adobecreativecloud/

Adobe Creative Cloud gives you the world’s best creative apps so you can turn your brightest ideas into your greatest work across your desktop and mobile devices.