Click HERE for the Custom Brush: http://phlearn.com/how-to-create-stars-in-photoshop
Start with Photoshop 101 & 201: http://phlearn.com/product/photoshop-101-201-bundle
Retouch like a pro with The Ultimate Guide to Retouching: http://phlearn.com/product/the-ultimate-guide-to-retouching
Use the same Tablet as Aaron: http://amzn.to/1Eykaoh
Dress the part in a Phlearn Shirt: http://phlearn.com/product-category/gear
Practice Image: http://adobe.ly/202V5jq
Facebook: https://www.facebook.com/Phlearn/
Twitter: https://twitter.com/Phlearn
Instagram: https://www.instagram.com/phlearn/
Snapchat username: Phlearn
Phlearn discount for Creative Cloud: http://adobe.ly/1MWG5Kq
Stock Images provided by: https://stock.adobe.com/
Subscribe: http://goo.gl/LBIEQU
Getting Started
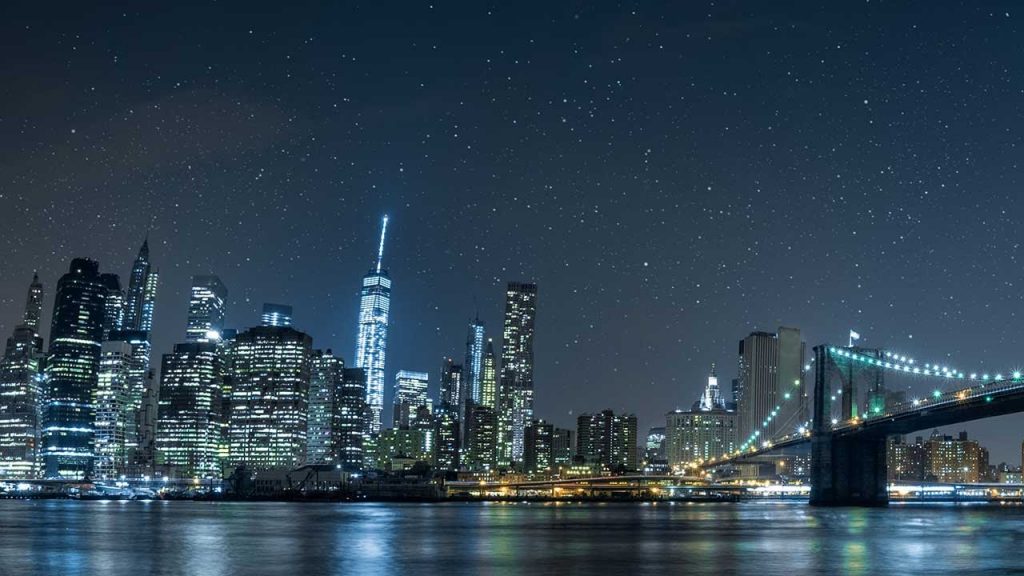
How awesome would it be to be able to create stars?! Now of course, this can’t be done in real life but in Photoshop, the possibilities are endless. We start off by selecting our image. We choose a beautiful panoramic image of the New York Skyline. Now in our original photo, there are no stars in the sky. This is perfect because it gives us room to operate in Photoshop. Some people might approach this process by creating a tiny brush and manually placing the stars into the skyline. This might not be the best approach for two simple reasons:
It would take you a great amount of time to position stars manually in Photoshop.
It won’t look realistic, all the stars would look exactly the same.
We knew that we had to approach creating stars with a different mindset if we wanted it to be time efficient and look realistic.
Creating a Custom Brush
We start off with creating a Custom Brush. We bring up a new document and make the size 500 x 500 pixels. After we have our new document, we focus on the details of our Custom Brush. Whenever creating a Custom Brush, make sure the background is white and the Brush color is black. We paint two tiny dots on opposite ends of our document. This will give the stars more variation when we actually place them on our image. Now that we have our Star Brush created we are halfway done. We need to change our Brush Settings in order to get our Star Brush to where we want it. We adjust our Shape Dynamics, Angle Jitter, and even Brush Size until our Star Brush is perfect. Scattering and Transfer also help with the spacing and visibility of our Star Brush. The goal is for our stars to look realistic, there should be no specific pattern or predictability. We finalize everything by saving a New Brush Preset. Make sure you name your Brush something easy to remember. Now that you’ve saved your new Brush, it’ll always be available for you!
Painting Stars
We begin painting stars over our image. We play around with the settings by making the size a bit larger and smaller. This helps us add variation to our stars. We then go back in and apply a Layer Mask to the image. We paint black every on the image that we don’t want our stars showing up. We decided to add a glow to our stars. Using our Layer Effects, we click on Outer Glow and choose the color of the glow. We bring the size of our stars up a bit and bring the Opacity down a bit as well. We finish things off by adding a Motion Blur to our stars. We adjust the Distance and Angle to our liking and this really helps sell the effect. We zoom out to make sure the stars are to our liking. The great thing about having the brush saved is that it’s easy to start over if we want. Now get out there and add some stars to some skies!
Comments
comments
