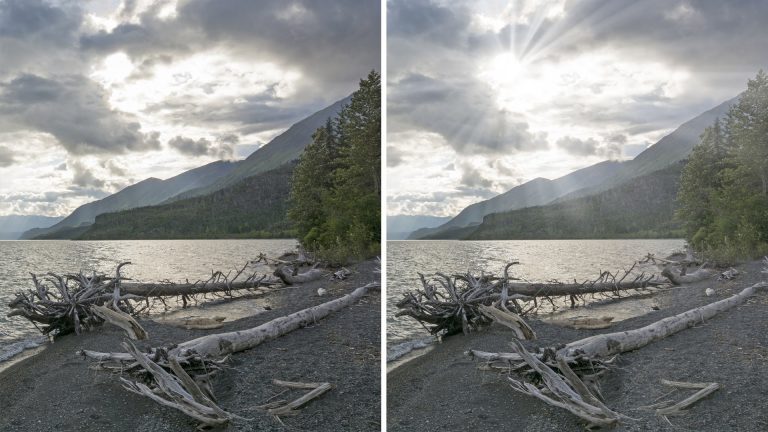
Light rays are fun to create, and can make a big difference in your photos! Learn how to identify the best place to put light rays and how to create them using a brush tool and a radial blur filter.
Use the Radial Filter to Create Light Rays
It is important that light rays come from a light source. Start by identifying the light source in an image, then duplicate the background layer.
Next, convert the duplicate to a smart object, this will make it possible to use a smart filter. Smart filters can be changed at any time, making them easier to work with than regular filters.
Go to ‘filter – blur – radial blur’ and choose ‘zoom’. Next change the zoom level of the blur, anything over 90 should be good. Choose a blur center and hit ‘ok’.
Chances are, the blur center you chose isn’t perfectly in place. To adjust the blur center, double click on the smart filter and move the blur center. Repeat until you nail the center of the light source.
Now that the blur is set in place, it is time to make the light rays. Create a new layer and use the brush tool to paint daubs of white around the light source. Press CMD+F to apply the radial blur filter to the paint daubs, stretching them into light rays. Paint and blur until the light rays look perfect!