Our #1 PRO Tutorial ever is now on Sale! https://phlearn.com/popular
How to Remove Scars in Photoshop
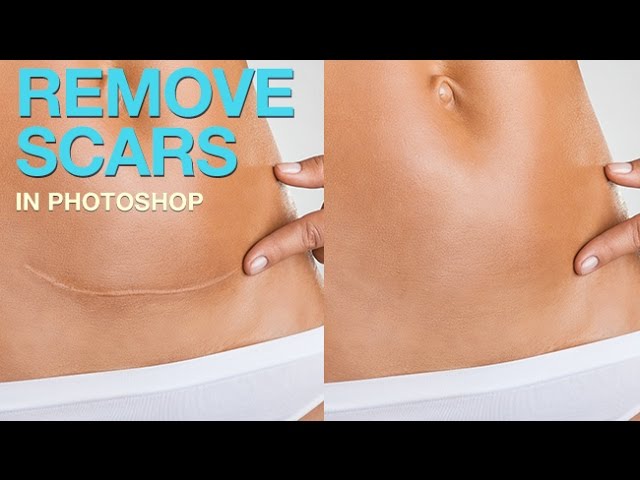
Scars are a natural part of life, but they can also attract attention away from your subject. In today’s tutorial, we teach you a fast, easy way to remove scars, so you can create clear skin anytime you want!
How to Correct Light and Dark Skin
The skin around a scar tends to either be lighter or darker than the surrounding skin. To correct for light or dark areas, it can be helpful to view your image in black and white.
To turn an image black and white temporarily – go to ‘Layer – New Adjustment Layer – Black and White’. With color removed, it is easier to correct light and dark areas.
To correct these light or dark areas, create a Curves Adjustment Layer by going to ‘Layer – New Adjustment Layer – Curves’. Fill the layer mask with black to make the layer temporarily invisible by going to ‘Edit – Fill – Black’.
Next, use a soft-edged brush to paint white on the layer mask where the skin needs to be lightened or darkened. You can double-click on the Curves Adjustment Layer Icon to change the curve values at any time. This technique offers a lot of flexibility, so lighten and darken with Curves until the area you painted over top of blends in with the rest of the skin.
How to Color Correct Skin
To correct redness in the skin, first target the red areas. Create a Hue/Saturation Adjustment Layer by going to ‘Layer – New Adjustment Layer – Hue/Saturation’. Next, click on the drop-down menu and change the value from ‘Master’ to ‘Reds’. Any changes will affect all the reds in the image, including the regular skin color.
To refine the red areas, use the eyedropper in the Hue/Saturation Dialog to sample the reds, then use the sliders on the bottom to contract the affected area. To make the changes more visible, increase the Hue and Saturation (temporarily). Then, click + drag the center of the gray slider left and right until you see just the red scar area changing color.
Once the red scar area is targeted, bring the Hue and Saturation sliders back to 0. Move the Hue slider to the right until the red becomes skin color. It may be necessary to lower the saturation and increase lightness to match the skin color completely.
How to Remove the Scar
After correcting for light, dark and colored skin, it is time to remove the scar tissue. The goal is to sample ‘good skin texture’ and replace the ‘bad skin texture’.
Photoshop provides two great tools for the job – The Healing Brush Tool and the Clone Stamp Tool. Press ALT/OPTN + CLICK on the desired skin texture to create a ‘Sample Point’, then paint over the scar to remove it.
We recommend starting with The Healing Brush Tool, then moving onto the Clone Stamp Tool if it doesn’t do the job well on its own.
VISIT PHLEARN.COM FOR MORE FREE TUTORIALS
SUBSCRIBE TO OUR CHANNEL FOR MORE FREE TIPS AND TRICKS
http://www.youtube.com/subscription_center?add_user=phlearnllc
GET FREE TUTORIALS IN YOUR EMAIL + DISCOUNTS ON OUR PRO TUTORIALS!
https://phlearn.com/mail
BUY THE TABLET AARON USES! https://phlearn.com/tablet
LET’S BE FRIENDS!
Instagram ► https://www.instagram.com/phlearn/
Facebook ► https://facebook.com/phlearn
Twitter ► https://twitter.com/phlearn
Google+ ► https://plus.google.com/116791098059215639405
Phlearn ► https://phlearn.com