Home Graphic Photoshop How to Use Hue/Saturation in Photoshop

How to Use Hue/Saturation in Photoshop

This episode was designed for beginners, but it’s good to brush up on your skills no matter what level you are. Learn how to Use Hue/Saturation in Photoshop!

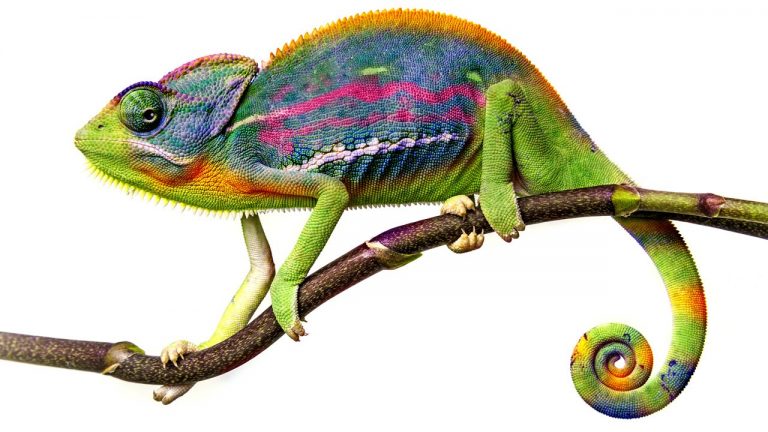
Download our practice image from Adobe Stock here: https://stock.adobe.com/stock-photo/chameleon/60473435

Global Saturation Adjustments:

In order to work non-destructively, it’s best to create a new Hue/Saturation adjustment layer rather than adjusting from the menu bar.

By default, the Hue/Saturation dialogue box will change ALL of the colors in an image when the sliders are adjusted. But this can be changed!

Local Saturation Adjustments:

To do so, go the the “Master” drop down menu. You will see many other colors, which can be selected and adjusted individually.

This method will select, again, ALL of that specific color found in the image. But what can you do if you only want a certain shade of green to change? You can use the Eyedropper tool! We use it by pressing the icon on the left. Once your cursor turns into an eyedropper, you can click on one point in the image and it will target just that exact color. You can also click and drag the grey slider that appears between the two colored bars.

Colorizing:

Create a new Hue/Saturation layer and check the “Colorize” button. This will change the entire image to the same color! This is handy if you’d like to change, for example, a red shirt to a green shirt. There isn’t much variation in the color, however. If you’re looking for some more variation you can turn down the opacity of the layer so that some of the original image comes through.

Painting on an image

If you’re looking to add some color in a unique design, you can do that too! We create a new blank layer and then use the brush tool to paint some bright pink onto the image. At this point, the pink looks very obviously Photoshopped. To play with how the color blends into the photo, try using different Blending Modes. The “Color” blending mode yields a beautiful result, as does “Hue” and “Overlay.”

———————————————————————————————-

Thanks for watching Phlearn! If you enjoyed this video be sure to subscribe to our channel so you don’t miss a thing!

Subscribe: http://goo.gl/LBIEQU

For more advanced Photoshop Tutorials be sure to check out our Phlearn PRO Tutorials. We offer the best Photoshop tutorials available starting at just $24.99.

http://phlearn.com/product-category/pro-photoshop-tutorials

———————————————————————————————-

Stock Images provided by: https://stock.adobe.com/

Comments

comments

Latest articles

Easy Ways to Select Artwork in Illustrator | Adobe Creative Cloud

Explore a variety of methods for making selections in your projects to make creating and editing faster and easier in Adobe Illustrator. To download the sample files and learn more about Artwork selection methods, click on https://adobe.ly/2AXMTv1 Subscribe: https://www.youtube.com/user/adobecreativecloud?sub_confirmation=1 LET’S CONNECT Facebook: http://facebook.com/adobecreativecloud Twitter: http://twitter.com/creativecloud Instagram: http://www.instagram.com/adobecreativecloud/ Adobe Creative Cloud gives you the world's best creative apps so you can turn your brightest ideas into your greatest work across your desktop and mobile devices.

Transform Artwork Freely in Illustrator Using Puppet Warp | Adobe Creative Cloud

Learn how to transform artwork using the Puppet Warp and Free Transform tools in Adobe Illustrator. To download the sample files and explore more tutorials on Artwork selection in Illustrator, go to https://adobe.ly/2vul87Y Subscribe: https://www.youtube.com/user/adobecreativecloud?sub_confirmation=1 LET’S CONNECT Facebook: http://facebook.com/adobecreativecloud Twitter: http://twitter.com/creativecloud Instagram: http://www.instagram.com/adobecreativecloud/ Adobe Creative Cloud gives you the world's best creative apps so you can turn your brightest ideas into your greatest work across your desktop and mobile devices.

How to Make a Custom Brush with Adobe Capture CC | Adobe Creative Cloud

Create a brush from a simple sketch. Start from scratch, or download practice files [https://learndownload.adobe.com/pub/learn/mobile-apps/make-a-custom-brush.zip] for a head start. Steps below. Prep your project: 1. Save the practice image (source-image.jpg) provided here to the Camera Roll on your mobile device, or use your own. 2. Download the Adobe Capture CC mobile app from the App Store for your iOS device, or from the Play Store for you Android. Open the app and sign in with your Adobe ID. 3. Tap Brushes from the top menu. Create a custom brush: 1. Tap Brushes from the menu. 2. Tap the image icon at the bottom, then tap Camera Roll. 3. Choose an image from your Camera Roll. 4. Tap areas to erase unwanted marks. Tap the checkmark. 5. Drag the resize handles (white dots) to position the blue box around the part of the image you want to use as the brush. 6. Tap Styles from the main menu. Tip: For the example in the video, we chose a style in the Photoshop CC & Adobe Sketch Brushes section. 7. Tap Presets. Adjust the Size, Spacing, and other settings as you like. Tap Done, or the right arrow on Android devices. 8. Choose the appropriate Creative Cloud Library. Tap Save. Apply style in Adobe Photoshop CC: 1. Open artwork in Photoshop. 2. Choose the Brush tool. 3. Choose your new brush from the Libraries panel (Window – Libraries). 4. Use the new brush to enhance your creation. That's it! To learn more about Adobe Capture and Adobe's other mobile apps, visit our Mobile apps Tutorials page. Subscribe: https://www.youtube.com/user/adobecreativecloud?sub_confirmation=1 LET’S CONNECT Facebook: http://facebook.com/adobecreativecloud Twitter: http://twitter.com/creativecloud Instagram: http://www.instagram.com/adobecreativecloud/ Adobe Creative Cloud gives you the world's best creative apps so you can turn your brightest ideas into your greatest work across your desktop and mobile devices.

Bring Dull Photos to Life Using Lightroom CC | Adobe Creative Cloud

Learn how to enhance sharpness, detail, and textures using Clarity and Dehaze sliders in Lightroom CC. Download sample files and learn more about image editing techniques in Lightroom: https://adobe.ly/2wbDUS0 Subscribe: https://www.youtube.com/user/adobecreativecloud?sub_confirmation=1 LET’S CONNECT Facebook: http://facebook.com/adobecreativecloud Twitter: http://twitter.com/creativecloud Instagram: http://www.instagram.com/adobecreativecloud/ Adobe Creative Cloud gives you the world's best creative apps so you can turn your brightest ideas into your greatest work across your desktop and mobile devices.

Comments

comments