Home Blog Page 3

Get Started with Photoshop and Dimension CC | Adobe Creative Cloud

0

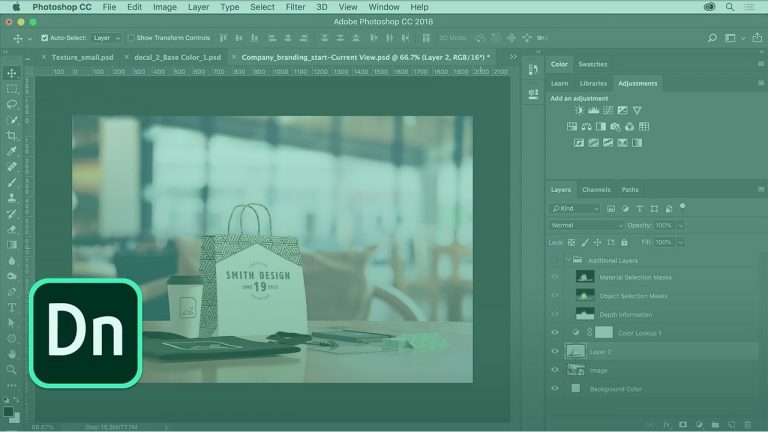
Get started with Photoshop and Dimension CC: https://adobe.ly/2O4GteQ See how to go from Photoshop to Dimension CC to visualize your designs. Learn how to edit content and create designs in photorealistic settings, work with artboards and edit content in Photoshop and import it into Dimension.

Subscribe: https://www.youtube.com/user/adobecreativecloud?sub_confirmation=1

LET’S CONNECT
Facebook: http://facebook.com/adobecreativecloud
Twitter: http://twitter.com/creativecloud
Instagram: http://www.instagram.com/adobecreativecloud/

Adobe Creative Cloud gives you the world’s best creative apps so you can turn your brightest ideas into your greatest work across your desktop and mobile devices.
How to Make a Spooky Self-Portrait with Adobe Photoshop Sketch | Adobe Creative Cloud

0

Take your portrait and make it scary.

Start from scratch, or download practice files [https://adobe.ly/2qiUQTb] for a head start. Steps below.

Prep your project:

1. Save the Adobe Stock image and Kyle’s brushes (.abr file) to the Creative Cloud Files folder on your computer.

TIP: Here’s[https://adobe.ly/2ICVMZq] a tutorial that shows other ways you can load Kyle’s brushes into Adobe Sketch.

2. Download the Adobe Photoshop Sketch mobile app from the App Store for iOS[https://apple.co/2nY72rW], or from the Play Store[https://adobe.ly/2zbsTB2] for Android. Open the app and sign in with your Adobe ID.

NOTE: Check the App Store and Play Store for the minimum OS requirements for running Adobe Photoshop Sketch on your mobile device.

Spookify a portrait:

1. Tap + to start a new project.
2. Choose a portrait-layout Format.
3. Load the portrait: Tap the Background layer, tap the + icon and choose Image Layer, tap My Files, choose the portrait from the practice files, or use your own. Tap Open. Tap Done.
4. Load Kyle’s brushes: Tap and hold one of the brushes to display additional brushes. Tap Add, tap Import from CC Assets, tap Kyle’s Inktober Brushes.abr, then tap Open to load the brushes.

NOTE: If you added the brushes to a library, choose it from the Libraries list.

5. Choose the brush settings: Tap the brush you want to use to select it. Tap the brush again to display additional options. Tap Size and drag up or down to adjust the brush size. Tap Color to change the brush color.
6. Paint the base colors: Tap the Sketch Layer. Paint on the parts of the portrait you want to enhance. Adjust the brush size as needed when painting different areas. Tap the slider icon below Color to explore Opacity and other brush settings.

NOTE: We chose a light yellow to paint the “mummy bandages”. You can choose colors from a color wheel, RGB palette, or Themes. These options are available at the top of the color palette.

7. Add details: Tap the + icon and add a new Sketch Layer. Change the brush to a small, dark tip. Brush in the outline of the self-portrait and the lines that define the bandages and other elements.
8. Experiment with the different brushes and settings and have fun adding more spooky details.

That’s it!

To learn more about Adobe Photoshop Sketch and Adobe’s other mobile apps, visit our Mobile apps Tutorials page:
https://adobe.ly/2SrbX2b

Subscribe: https://www.youtube.com/user/adobecreativecloud?sub_confirmation=1

LET’S CONNECT
Facebook: http://facebook.com/adobecreativecloud
Twitter: http://twitter.com/creativecloud
Instagram: http://www.instagram.com/adobecreativecloud/

Adobe Creative Cloud gives you the world’s best creative apps so you can turn your brightest ideas into your greatest work across your desktop and mobile devices.

Use Adobe Dimension CC to Add Logos and Graphics to a Design | Adobe Creative Cloud

0

Get Started in Dimension CC: https://adobe.ly/2yKZZbi Learn how to add logos and graphics in Adobe Dimension CC to visualize your designs.

Subscribe: https://www.youtube.com/user/adobecreativecloud?sub_confirmation=1

LET’S CONNECT
Facebook: http://facebook.com/adobecreativecloud
Twitter: http://twitter.com/creativecloud
Instagram: http://www.instagram.com/adobecreativecloud/

Adobe Creative Cloud gives you the world’s best creative apps so you can turn your brightest ideas into your greatest work across your desktop and mobile devices.

How to Make Magic with Gradients using Adobe Illustrator | Adobe Creative Cloud

Design complex gradients with ease.

Start from scratch, or download practice files [https://learndownload.adobe.com/pub/learn/illustrator/make-magic-with-gradients.zip] for a head start. Steps below.

1. Update to the latest version of Illustrator CC to use the Freeform Gradient feature.
2. Open your drawing, or use ours (make-gradient_download.ai).
3. Choose the Direct Selection Tool (A) and select a section of the bird.
4. Open the Gradient panel (Window – Gradient).
5. Choose the Freeform Gradient from the Type section.

Apply gradients with points:

1. Make sure Points is selected in the Gradient panel.
2. Double-click a color stop to open the color swatch and apply a new color.

Apply gradients with lines:

1. Use the Direct Selection Tool (A) to select a different section of the bird.
2. Choose the Freeform Gradient.
3. Choose Lines in the Gradient panel.
4. Click to add points to the path. Press Esc on your keyboard when you’re finished.
5. Double-click a color stop and add colors to different points along the path.

Use these methods to finish the composition.

Tips: Click on a color stop and drag to reposition it. Drag the circle on one of the color stops to change the spread of the gradient. Double-click to add color stops. Select a color stop and click the Delete Stop icon, or press the Delete key on your keyboard, to remove it.

That’s it!

To learn more, visit our Illustrator Tutorials page.

Subscribe: https://www.youtube.com/user/adobecreativecloud?sub_confirmation=1

LET’S CONNECT
Facebook: http://facebook.com/adobecreativecloud
Twitter: http://twitter.com/creativecloud
Instagram: http://www.instagram.com/adobecreativecloud/

Adobe Creative Cloud gives you the world’s best creative apps so you can turn your brightest ideas into your greatest work across your desktop and mobile devices.

Make Your First Layer Mask with Photoshop | Adobe Creative Cloud

0

Learn how to use a layer mask to hide part of a layer. Download sample files and learn more about layer masks: https://adobe.ly/2zQHXo6.

Subscribe: https://www.youtube.com/user/adobecreativecloud?sub_confirmation=1

LET’S CONNECT
Facebook: http://facebook.com/adobecreativecloud
Twitter: http://twitter.com/creativecloud
Instagram: http://www.instagram.com/adobecreativecloud/

Adobe Creative Cloud gives you the world’s best creative apps so you can turn your brightest ideas into your greatest work across your desktop and mobile devices.

Page layout: Set Page Margins and Add Guides in InDesign | Adobe Creative Cloud

0

Learn how to create margins and column guides and use them to position text and images. Download practice files and learn more about page layout: https://adobe.ly/2TigIvw 

Subscribe: https://www.youtube.com/user/adobecreativecloud?sub_confirmation=1

LET’S CONNECT
Facebook: http://facebook.com/adobecreativecloud
Twitter: http://twitter.com/creativecloud
Instagram: http://www.instagram.com/adobecreativecloud/

Adobe Creative Cloud gives you the world’s best creative apps so you can turn your brightest ideas into your greatest work across your desktop and mobile devices.

Adjust Audio Track Volume with Premiere Pro | Adobe Creative Cloud

Learn how to apply track-based audio level adjustments for advanced mixing. To download practice files and to understand more about audio mixes, go to: https://adobe.ly/2ThltVW

Subscribe: https://www.youtube.com/user/adobecreativecloud?sub_confirmation=1

LET’S CONNECT
Facebook: http://facebook.com/adobecreativecloud
Twitter: http://twitter.com/creativecloud
Instagram: http://www.instagram.com/adobecreativecloud/

Adobe Creative Cloud gives you the world’s best creative apps so you can turn your brightest ideas into your greatest work across your desktop and mobile devices.

How to Make a Hand-Drawn Logo with Adobe Capture and Adobe Illustrator | Adobe Creative Cloud

Convert your sketch to a vector logo.

Start from scratch, or download practice files [https://learndownload.adobe.com/pub/learn/creative-cloud/hand-drawn-logo.zip] for a head start. Steps below.

Prep your project:

1. Download the Adobe Capture CC mobile app from the App Store for your iOS device, or from the Play Store for you Android. Open the app and sign in with your Adobe ID.
2. Load the sketch into Capture:
a. Option 1: Adobe Capture opens with a live camera. Use this to take a picture of your sketch.
b. Option 2: To use the sketch we provided or an image of another sketch, save the image to your Camera Roll. Then, switch to Capture and tap the image icon at the bottom right of the screen, choose Camera Roll, and choose the image you would like to vectorize.

Note: If you are on an Android device, or an earlier version of iOS, the interface may be different. Make sure you are in the Shapes module and load the image you want to use.

Vectorize the sketch:

1. Use the slider to adjust the details shown in the sketch or tidy up any stray marks. Tap the checkmark when done.
2. Tap Crop, then drag the handles to isolate the image you want to use.
3. Tap Smooth, then tap On to smooth the lines of the sketch. Tap Save.

Give your sketch some personality:

1. Create a new file in Illustrator.
2. Open the Libraries pane (Window – Libraries) and drag the sketch from the library and place it in the new document.
3. Use the Selection Tool (V) to select it.
4. Choose the Puppet Warp Tool and click to add joints to the top of the leg and the knee. Drag to rotate at the knee so it looks like the character is kicking off from the skateboard.

That’s it!

To learn more, visit our Illustrator Tutorials page.

Subscribe: https://www.youtube.com/user/adobecreativecloud?sub_confirmation=1

LET’S CONNECT
Facebook: http://facebook.com/adobecreativecloud
Twitter: http://twitter.com/creativecloud
Instagram: http://www.instagram.com/adobecreativecloud/

Adobe Creative Cloud gives you the world’s best creative apps so you can turn your brightest ideas into your greatest work across your desktop and mobile devices.
Getting Started in Illustrator & Illustrator Draw

Get started in Illustrator & Illustrator Draw with Paul Trani! In this episode Paul will demonstrate how to go from idea to full illustration using both Illustrator Draw and Illustrator.

Then, join us on Adobe Live, Tuesday at 9am PT, where you can use what you’ve learned from Paul to work alongside four professional graphic designers as they take you through their process. Find out what inspires them, how they problem solve and what it takes to create beautifully designed experiences.

Paul Trani is a Senior Worldwide Evangelist for Adobe where he inspires designers everywhere to use their creativity and new technology to create compelling experiences for all screens. With over 20 years of experience across 40 countries Paul has become a sought after designer, speaker and presenter on all things design and creative related.

—–

► Click HERE to watch LIVE: http://bit.ly/AdobeLiveBe
► View our SCHEDULE: http://bit.ly/BeSchedule
► Click HERE for REPLAYS: http://bit.ly/AdobeLivePlaylists

► Behance: https://www.behance.net/paultrani
► Instagram: http://www.instagram.com/ptrani
► Twitter: http://twitter.com/paultrani
► Facebook: https://www.facebook.com/paulryantrani

Add Photos Into a Composite with Photoshop | Adobe Creative Cloud

0

Learn how to combine images into one composite. To download practice files and learn more about photo compositing, go to: https://adobe.ly/2zH5wR0

Subscribe: https://www.youtube.com/user/adobecreativecloud?sub_confirmation=1

LET’S CONNECT
Facebook: http://facebook.com/adobecreativecloud
Twitter: http://twitter.com/creativecloud
Instagram: http://www.instagram.com/adobecreativecloud/

Adobe Creative Cloud gives you the world’s best creative apps so you can turn your brightest ideas into your greatest work across your desktop and mobile devices.