Home Graphic Photoshop ADVANCED: Change Background Colors & Change the Color of ANYTHING in Photoshop...

ADVANCED: Change Background Colors & Change the Color of ANYTHING in Photoshop with LAB Color Trick

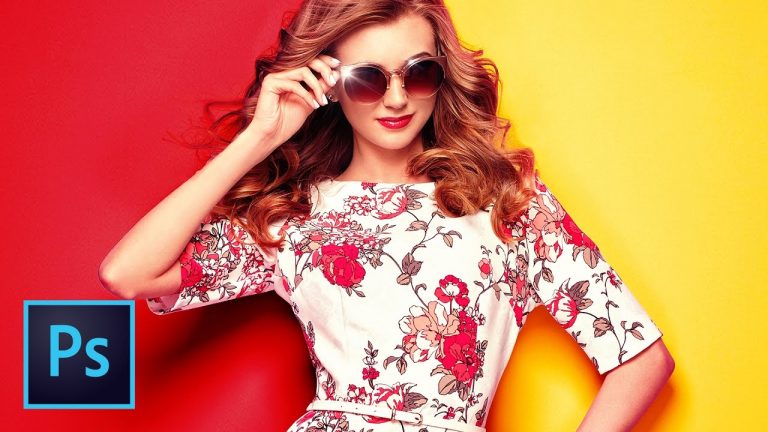
USE LAB AND RGB COLOR AT THE SAME TIME! | Learn the quick and dirty way to change color and look at the more flexible and advanced way to change and create color in Photoshop as well! | We will cover adjustment layers, reading data, Curves, how LAB works, and so much more!

? ↓ VIDEO GUIDE ↓ ?
01:27 Get right to the tutorial (skip the intro banter)
02:07 Creating and refining a selection
04:48 The “basic” background color change
07:28 The full Photoshop Retouching Course link
07:49 Tweaking the “basic” color change and trying different blend modes
09:25 Correcting a color fringe/reflection with masks and Hue/Saturation
11:15 The ADVANCED technique starts here (explanation of LAB color)
13:17 Gathering data and displaying in our Info panel
14:54 Adding the first Adjustment Layer
15:17 Building and matching the yellow color
18:26 Masking the effect into just the background
19:06 Building and matching the red color (more difficult!)
21:38 Examining some issues with the red color and tweaking the Curve
22:31 Splitting the color in the background. (Half red, half yellow!)
24:01 Checking the color and tweaking the red a little more
24:52 Explanation of why we worked in RGB and not LAB
25:57 Wrapping it up!

? Subscribe for Daily Tutorials → https://goo.gl/DN4Nln

? Buy the Photoshop Course and Support the Channel → http://bit.ly/28NuwFy

In this Photoshop CC tutorial, we’ll use the LAB readouts in the Info panel to sample a color swatch and use those numbers to guide our RGB Curves Adjustment Layer to get a perfect background color. We’ll have some fun with a simple colorization technique and then take a deeper dive into the advanced stuff and how to make the background any color you would ever want. This technique works with ANY object you would ever want to colorize in Photoshop.

Stock I used: https://www.dreamstime.com/stock-photo-blonde-young-woman-floral-spring-summer-dress-girl-posing-pink-background-outfit-stylish-wavy-hairstyle-image90343848

⚡️ written tutorial is here: http://bit.ly/2pLOidG

INSTAGRAM: http://instagram.com/tutvid
TWITTER: http://twitter.com/tutvid
FACEBOOK: https://www.facebook.com/tutvid
SNAPCHAT: tutvid.com

tutvid is a YouTube channel dedicated to creating the best Adobe Photoshop, Premiere Pro, Lightroom, and Illustrator tutorials. My goal is to create the best, most informative, and entertaining tutorials on the web. If you enjoy my videos, the best way to support what I do here is to purchase my course linked above or simply subscribe to the YouTube channel by pressing the red button.

✉️ business inquiries: nate@tutvid.com

CREDITS:
Social Icons in outro: http://www.freepik.com/free-vector/six-social-networking-icons-with-infographic-resources_982300.htm

Comments

comments

Latest articles

Easy Ways to Select Artwork in Illustrator | Adobe Creative Cloud

Explore a variety of methods for making selections in your projects to make creating and editing faster and easier in Adobe Illustrator. To download the sample files and learn more about Artwork selection methods, click on https://adobe.ly/2AXMTv1 Subscribe: https://www.youtube.com/user/adobecreativecloud?sub_confirmation=1 LET’S CONNECT Facebook: http://facebook.com/adobecreativecloud Twitter: http://twitter.com/creativecloud Instagram: http://www.instagram.com/adobecreativecloud/ Adobe Creative Cloud gives you the world's best creative apps so you can turn your brightest ideas into your greatest work across your desktop and mobile devices.

Transform Artwork Freely in Illustrator Using Puppet Warp | Adobe Creative Cloud

Learn how to transform artwork using the Puppet Warp and Free Transform tools in Adobe Illustrator. To download the sample files and explore more tutorials on Artwork selection in Illustrator, go to https://adobe.ly/2vul87Y Subscribe: https://www.youtube.com/user/adobecreativecloud?sub_confirmation=1 LET’S CONNECT Facebook: http://facebook.com/adobecreativecloud Twitter: http://twitter.com/creativecloud Instagram: http://www.instagram.com/adobecreativecloud/ Adobe Creative Cloud gives you the world's best creative apps so you can turn your brightest ideas into your greatest work across your desktop and mobile devices.

How to Make a Custom Brush with Adobe Capture CC | Adobe Creative Cloud

Create a brush from a simple sketch. Start from scratch, or download practice files [https://learndownload.adobe.com/pub/learn/mobile-apps/make-a-custom-brush.zip] for a head start. Steps below. Prep your project: 1. Save the practice image (source-image.jpg) provided here to the Camera Roll on your mobile device, or use your own. 2. Download the Adobe Capture CC mobile app from the App Store for your iOS device, or from the Play Store for you Android. Open the app and sign in with your Adobe ID. 3. Tap Brushes from the top menu. Create a custom brush: 1. Tap Brushes from the menu. 2. Tap the image icon at the bottom, then tap Camera Roll. 3. Choose an image from your Camera Roll. 4. Tap areas to erase unwanted marks. Tap the checkmark. 5. Drag the resize handles (white dots) to position the blue box around the part of the image you want to use as the brush. 6. Tap Styles from the main menu. Tip: For the example in the video, we chose a style in the Photoshop CC & Adobe Sketch Brushes section. 7. Tap Presets. Adjust the Size, Spacing, and other settings as you like. Tap Done, or the right arrow on Android devices. 8. Choose the appropriate Creative Cloud Library. Tap Save. Apply style in Adobe Photoshop CC: 1. Open artwork in Photoshop. 2. Choose the Brush tool. 3. Choose your new brush from the Libraries panel (Window – Libraries). 4. Use the new brush to enhance your creation. That's it! To learn more about Adobe Capture and Adobe's other mobile apps, visit our Mobile apps Tutorials page. Subscribe: https://www.youtube.com/user/adobecreativecloud?sub_confirmation=1 LET’S CONNECT Facebook: http://facebook.com/adobecreativecloud Twitter: http://twitter.com/creativecloud Instagram: http://www.instagram.com/adobecreativecloud/ Adobe Creative Cloud gives you the world's best creative apps so you can turn your brightest ideas into your greatest work across your desktop and mobile devices.

Bring Dull Photos to Life Using Lightroom CC | Adobe Creative Cloud

Learn how to enhance sharpness, detail, and textures using Clarity and Dehaze sliders in Lightroom CC. Download sample files and learn more about image editing techniques in Lightroom: https://adobe.ly/2wbDUS0 Subscribe: https://www.youtube.com/user/adobecreativecloud?sub_confirmation=1 LET’S CONNECT Facebook: http://facebook.com/adobecreativecloud Twitter: http://twitter.com/creativecloud Instagram: http://www.instagram.com/adobecreativecloud/ Adobe Creative Cloud gives you the world's best creative apps so you can turn your brightest ideas into your greatest work across your desktop and mobile devices.

Comments

comments