Home Graphic Photoshop Dodge And Burn Secrets: Adobe Photoshop CS6

Dodge And Burn Secrets: Adobe Photoshop CS6

Our #1 PRO Tutorial ever is now on Sale! https://phlearn.com/popular

Dodge and Burn Secrets: Adobe Photoshop CS6

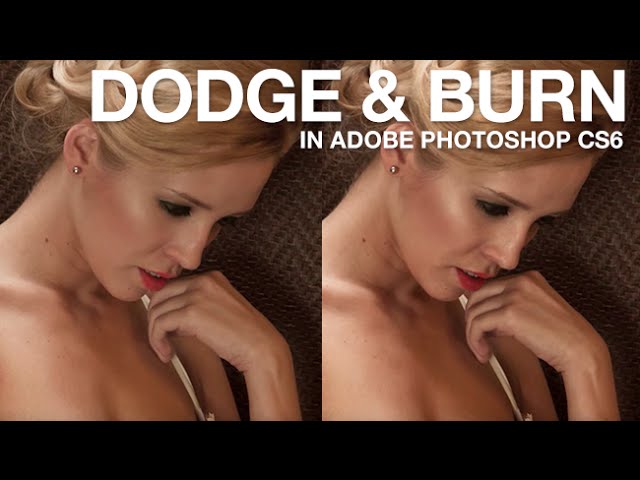
You can add incredible depth to your images by enhancing the highlights and the shadows. This method is called dodging and burning.

How to Use a Light Layer

On a new layer, set your brush color to white and lower the flow to about 0.05. Here we’re using a custom brush with a minimum diameter of 40% and the flow jitter set to pen pressure. (This brush setting works the best when using a tablet).

Now, paint by simply following the highlights of the image. Where the image is lighter, softly paint a layer of white. Be sure to focus mainly on areas you want to draw attention to, like the cheekbones, eyebrows, and cupid’s bow. Set your layer Blend Mode from Normal down to Soft Light for the most natural look.

Knowing where to paint and when to stop is an important skill for this technique! However if you’re new to dodging and burning, a helpful tool is ‘Blend If’, which will isolate your painting over just the lightest parts of the image.

How to Use a Dark Layer

On another new layer, set your brush color to a darker and less saturated tone of the skin. Do so by sampling your subject’s skin color using Alt/Option, and then adjusting it in the dialogue box.

Paint your burn in a similar way to the dodge, except in the places you want darkened and defined. Under the eyebrow, just below the cheekbone, and along the nose are great places to start. If you feel you went a bit too far, just use your eraser tool and clear it away.

Don’t worry if it takes a little while! A good dodge and burn will always takes time.

How to Use a more General ‘Blend If’

To really highlight the entire subject, sample the lightest color in the image and paint it until it completely covers the subject. (Ideally, don’t color the subject in areas that are too far from the focal point).

Then, go to ‘Blend If’ and do the same thing as with the dodging before. Be sure to set the blend to Soft Light to really get that low-lit effect.

Do the opposite by choosing a dark color and painting over the areas furthest from the focal point. Use ‘Blend If’ and see the contrast it makes! If it adds too much color to the image, lower the Hue/Saturation of the layer. Likewise, go ahead and color correct the face if you see it’s lost any tone from the dodging and burning.

————————————————————————————

VISIT PHLEARN.COM FOR MORE FREE TUTORIALS

Homepage

SUBSCRIBE TO OUR CHANNEL FOR MORE FREE TIPS AND TRICKS
http://www.youtube.com/subscription_center?add_user=phlearnllc

GET FREE TUTORIALS IN YOUR EMAIL + DISCOUNTS ON OUR PRO TUTORIALS!
https://phlearn.com/mail

BUY THE TABLET AARON USES! https://phlearn.com/tablet

LET’S BE FRIENDS!
Instagram ► https://www.instagram.com/phlearn/
Facebook ► https://facebook.com/phlearn
Twitter ► https://twitter.com/phlearn
Google+ ► https://plus.google.com/116791098059215639405
Phlearn ► https://phlearn.com

————————————————————————————

Dress the part in a Phlearn Shirt: https://phlearn.com/phlearn-tee-shirt-design-template-free-download

Previous Episode: https://www.youtube.com/watch?v=wVR1J48xV4k

Comments

comments

Latest articles

Easy Ways to Select Artwork in Illustrator | Adobe Creative Cloud

Explore a variety of methods for making selections in your projects to make creating and editing faster and easier in Adobe Illustrator. To download the sample files and learn more about Artwork selection methods, click on https://adobe.ly/2AXMTv1 Subscribe: https://www.youtube.com/user/adobecreativecloud?sub_confirmation=1 LET’S CONNECT Facebook: http://facebook.com/adobecreativecloud Twitter: http://twitter.com/creativecloud Instagram: http://www.instagram.com/adobecreativecloud/ Adobe Creative Cloud gives you the world's best creative apps so you can turn your brightest ideas into your greatest work across your desktop and mobile devices.

Transform Artwork Freely in Illustrator Using Puppet Warp | Adobe Creative Cloud

Learn how to transform artwork using the Puppet Warp and Free Transform tools in Adobe Illustrator. To download the sample files and explore more tutorials on Artwork selection in Illustrator, go to https://adobe.ly/2vul87Y Subscribe: https://www.youtube.com/user/adobecreativecloud?sub_confirmation=1 LET’S CONNECT Facebook: http://facebook.com/adobecreativecloud Twitter: http://twitter.com/creativecloud Instagram: http://www.instagram.com/adobecreativecloud/ Adobe Creative Cloud gives you the world's best creative apps so you can turn your brightest ideas into your greatest work across your desktop and mobile devices.

How to Make a Custom Brush with Adobe Capture CC | Adobe Creative Cloud

Create a brush from a simple sketch. Start from scratch, or download practice files [https://learndownload.adobe.com/pub/learn/mobile-apps/make-a-custom-brush.zip] for a head start. Steps below. Prep your project: 1. Save the practice image (source-image.jpg) provided here to the Camera Roll on your mobile device, or use your own. 2. Download the Adobe Capture CC mobile app from the App Store for your iOS device, or from the Play Store for you Android. Open the app and sign in with your Adobe ID. 3. Tap Brushes from the top menu. Create a custom brush: 1. Tap Brushes from the menu. 2. Tap the image icon at the bottom, then tap Camera Roll. 3. Choose an image from your Camera Roll. 4. Tap areas to erase unwanted marks. Tap the checkmark. 5. Drag the resize handles (white dots) to position the blue box around the part of the image you want to use as the brush. 6. Tap Styles from the main menu. Tip: For the example in the video, we chose a style in the Photoshop CC & Adobe Sketch Brushes section. 7. Tap Presets. Adjust the Size, Spacing, and other settings as you like. Tap Done, or the right arrow on Android devices. 8. Choose the appropriate Creative Cloud Library. Tap Save. Apply style in Adobe Photoshop CC: 1. Open artwork in Photoshop. 2. Choose the Brush tool. 3. Choose your new brush from the Libraries panel (Window – Libraries). 4. Use the new brush to enhance your creation. That's it! To learn more about Adobe Capture and Adobe's other mobile apps, visit our Mobile apps Tutorials page. Subscribe: https://www.youtube.com/user/adobecreativecloud?sub_confirmation=1 LET’S CONNECT Facebook: http://facebook.com/adobecreativecloud Twitter: http://twitter.com/creativecloud Instagram: http://www.instagram.com/adobecreativecloud/ Adobe Creative Cloud gives you the world's best creative apps so you can turn your brightest ideas into your greatest work across your desktop and mobile devices.

Bring Dull Photos to Life Using Lightroom CC | Adobe Creative Cloud

Learn how to enhance sharpness, detail, and textures using Clarity and Dehaze sliders in Lightroom CC. Download sample files and learn more about image editing techniques in Lightroom: https://adobe.ly/2wbDUS0 Subscribe: https://www.youtube.com/user/adobecreativecloud?sub_confirmation=1 LET’S CONNECT Facebook: http://facebook.com/adobecreativecloud Twitter: http://twitter.com/creativecloud Instagram: http://www.instagram.com/adobecreativecloud/ Adobe Creative Cloud gives you the world's best creative apps so you can turn your brightest ideas into your greatest work across your desktop and mobile devices.

Comments

comments