Home Blog Page 519

How to Colorize in Photoshop

0

Our #1 PRO Tutorial ever is now on Sale! https://phlearn.com/popular

How to Colorize in Photoshop

Take control of color in today’s episode – learn how to use Colorize to change the color of any object in Photoshop!

Create a Selection of the Area You Want to Colorize
In order to colorize a specific area of a photo, first you will need to create a selection around that area. In this example, we use “Select-Color Range’ to select out the pink hair.

After making the selection it needs to be refined. To refine the selection even more, hold ALT/OPTN and click on the layer mask of the Hue/Saturation Adjustment layer and paint white or black with the Brush Tool set to ‘Overlay’ Blend Mode.

Hue/Saturation + Colorize
Once the selection around the hair is perfect, click on the ‘Colorize’ Button in the Hue/Saturation Adjustment Layer Properties window.

When Colorizing an image, you have control over Hue, Saturation, and Lightness. You can use the combination of these three sliders to make any color.

In this tutorial, we use several Hue/Saturation Adjustment Layers to Colorize different parts of the hair and eye shadow.

How to Use Two Layer Masks on One Layer
In this example we work hard to create a great selection around the hair of the subject. Because we want to colorize different parts of the hair, it makes sense to keep the original layer mask intact.

To keep the original layer mask intact and hide additional parts of a layer, try grouping a layer with itself and adding a layer mask to that group. This is a way to effectively have two layer masks controlling the visibility of one layer.

VISIT PHLEARN.COM FOR MORE FREE TUTORIALS

Homepage

SUBSCRIBE NOW FOR MORE FREE TIPS AND TRICKS
http://www.youtube.com/subscription_center?add_user=phlearnllc

GET FREE TUTORIALS SENT TO YOUR EMAIL + DISCOUNTS ON OUR PRO TUTORIALS!
https://phlearn.com/mail

LET’S BE FRIENDS!
Instagram ► https://www.instagram.com/phlearn/
Facebook ► https://facebook.com/phlearn
Twitter ► https://twitter.com/phlearn
Google+ ► https://plus.google.com/116791098059215639405
Phlearn ► https://phlearn.com

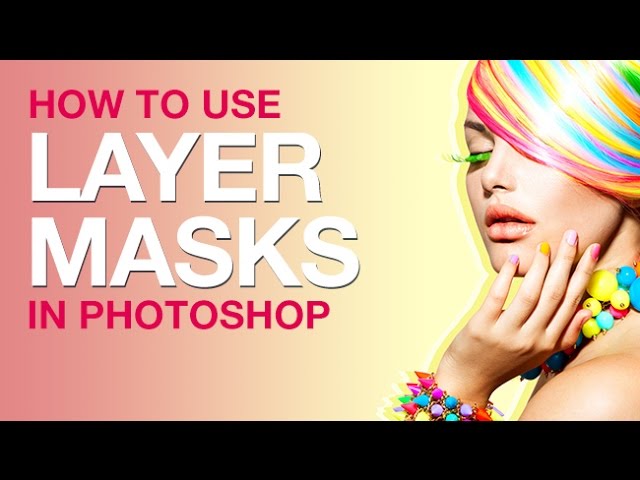
How to Use Layer Masks in Photoshop

0

Our #1 PRO Tutorial ever is now on Sale! https://phlearn.com/popular

How to Use Layer Masks in Photoshop
Layer Masks are one of the most important tools in Photoshop. In short, they make part of a layer visible and part invisible. The main advantage to using layer masks is they can be changed at any time – they are “non-destructive”, meaning they will never destroy image pixels!

What do Layer Masks Do?
Layer masks control the visibility of a layer, group, or adjustment layer. When a layer mask is completely white, the layer is completely visible. When a layer mask is completely black, the layer is completely invisible.

You can choose to make parts of a layer invisible by painting black in certain areas. You can use most of the tools in the tool panel on a layer mask including the brush tool, clone stamp tool, gradient tool and selections.

For instance, if you want to cut the subject out of their background, make a selection around the subject and load that selection as a layer mask, the subject will be visible and the background will be invisible.

Destructive vs. Non-Destructive Editing
When it comes to editing images in Photoshop, the ultimate goal is to do everything in a ‘non-destructive’ manner – meaning any change can be undone at any point in time.

For example, if you want part of a layer to disappear, using the eraser tool is destructive because it destroys the image, rather than just hiding it. If you use the eraser tool, then save and close an image, you won’t be able to undo those changes the next time you open the image in Photoshop.

In contrast, layer masks allow you to make changes at any time – even years from now. Rather than destroying image pixels, they simply hide them.

How to Create and Use Layer Masks
To add a layer mask to a layer, click on the layer mask icon at the bottom of the layers panel (it looks like a square with a circle inside).

You can also use the menu, go to ‘Layer – Layer Mask – Reveal All’ to make a white layer mask.

Adjustment layers come pre-loaded with layer masks, simply paint white or black on them to determine the visibility of the layer.

Helpful Keyboard Shortcuts
When working with Layer masks, a few keyboard shortcuts can go a long way.

SHIFT+CLICK on Layer Mask – Disable Layer Mask Temporarily
ALT/OPTN+CLICK on Layer Mask – Show Contents of Layer Mask
CTRL/CMD+CLICK on Layer Mask – Turn Layer Mask into Selection
CTRL/CMD+I – Invert Layer Mask
/ – View Layer Mask in Quick Mask Mode

VISIT PHLEARN.COM FOR MORE FREE TUTORIALS

Homepage

SUBSCRIBE TO OUR CHANNEL FOR MORE FREE TIPS AND TRICKS
http://www.youtube.com/subscription_center?add_user=phlearnllc

GET FREE TUTORIALS IN YOUR EMAIL + DISCOUNTS ON OUR PRO TUTORIALS!
https://phlearn.com/mail

BUY THE TABLET AARON USES! https://phlearn.com/tablet

LET’S BE FRIENDS!
Instagram ► https://www.instagram.com/phlearn/
Facebook ► https://facebook.com/phlearn
Twitter ► https://twitter.com/phlearn
Google+ ► https://plus.google.com/116791098059215639405
Phlearn ► https://phlearn.com

How to Remove People from the Background in Photoshop

0

Our #1 PRO Tutorial ever is now on Sale! https://phlearn.com/rtyoutube

How to Remove People from Vacation Photos in Photoshop

You just got back from a wonderful vacation and can’t wait to post your photos online, but there are a bunch of people in the background distracting from the gorgeous scenery. Learn how to remove people from the background of your photos in today’s episode.

Photoshop Tools for Removing People
When it comes to removing people from photos, there are several tools that will do the job, depending on your image. It is best to learn every tool so you can best choose the right one for the job. In this episode, we teach you each tool for removing people from their backgrounds.

Spot Healing
The Spot Healing Brush tool is probably the easiest tool to use, so we recommend starting here. Be sure to create a new layer before healing and set the tool settings to “Sample all Layers” and “Content Aware”. When you are ready to remove a person, simply paint over the person, the tool will do the rest.

Healing Brush
The Spot Healing Brush tool works well most of the time, but because it automatically chooses the sample point for you, sometimes it doesn’t copy the correct texture. If you need to choose your own sample texture, go with the Healing Brush Tool. Hold ALT/OPTN and click on the desired texture area, then paint over the person you would like to remove. Be sure to cover the entire person to properly remove them. If needed, repeat to clean up any remaining areas.

Clone Stamp
The Clone Stamp Tool will create an exact copy of the sample point – meaning it won’t blend like the Spot Healing Brush and the Healing Brush. This can be advantageous at times, especially when working around sensitive areas and edges.

Patch Tool
The Patch Tool is like a large-scale Healing Brush. First, be sure to check “Sample all Layers” and “Content Aware”, then draw a selection around the object you would like to remove. Once selected, click and drag the selection to the desired area, the patch will be replaced with the sampled area.

Content-Aware Fill
Content Aware Fill will work well on simple backgrounds where the subject is isolated. To use Content-Aware Fill, make a selection around the person or object you would like to remove and go to ‘Edit – Fill’ and choose ‘Content Aware’ from the drop-down menu. Photoshop will find similar areas to the background in the selection and fill them in, replacing the object in the selection.

VISIT PHLEARN.COM FOR MORE FREE TUTORIALS

Homepage

SUBSCRIBE TO OUR CHANNEL FOR MORE FREE TIPS AND TRICKS
http://www.youtube.com/subscription_center?add_user=phlearnllc

GET FREE TUTORIALS IN YOUR EMAIL + DISCOUNTS ON OUR PRO TUTORIALS!
https://phlearn.com/mail

BUY THE TABLET AARON USES! https://phlearn.com/tablet

LET’S BE FRIENDS!
Instagram ► https://www.instagram.com/phlearn/
Facebook ► https://facebook.com/phlearn
Twitter ► https://twitter.com/phlearn
Google+ ► https://plus.google.com/116791098059215639405
Phlearn ► https://phlearn.com

How to Use Virtual Copies in Lightroom

0

How to Use Virtual Copies in Lightroom

Learn how to create multiple versions of your photos and save disk space by using Virtual Copies in Lightroom – your clients will love you for it!

How to Create Virtual Copies

To create a virtual copy of an image in Lightroom, simply right-click on an image and go to ‘Create Virtual Copy’. No additional files will be created on your computer, these copies are references of the original image stored in the Lightroom catalog.

Create Multiple Versions of Each Image

Creating Virtual Copies will allow you to have multiple edited versions of your images that you can then send to your clients.

In this example we create two Virtual Copies of our main image and make one of the copies ‘Black & white’ and another ‘Sepia’. These edits take very little time and make it look like you are delivering much more!

Sync Settings and Presets

After creating ‘Black & White’ and ‘Sepia’ toned images, the same develop settings can be applied to multiple images in a catalog. To sync settings, simply click on the source image, then CTRL/CMD+CLICK on the second image in a series and go to ’Sync Settings’ in the Library module. Click on ’Check All’ and click ’Synchronize’. The develop settings you applied on the first image will be transferred onto the rest of the images selected in the Sync.

If you would like to create a Preset, start by clicking on the ‘Develop’ module at the top of the screen and go to ‘Presets’ on the left hand side. After making adjustments, click on the ‘+’ icon in the presets screen and name your preset under ‘User Presets’.

You can apply this preset to any image moving forward simply by clicking on the preset name in the preset window.

Exporting Virtual Copies

In this example, we create a ‘Color’, ‘Black & White’ and ‘Sepia’ version of two images and want each to be exported by editing style.

Start by selecting each of the variations and right-clicking to navigate to Export. For naming convenience, click on the ‘Rename’ option and choose ‘Filename – Sequence’ and type in a name for the editing variation. Export to “Choose Folder Later’ and then create a folder name that mirrors the editing name on your computer and place the images in that folder.

In this example, we create folders named ‘Color’ ‘BW’ and ‘Sepia’ and export each edited variation into each of the folders.

This way, when it comes time to deliver images to your clients, they will receive pre-sorted folders with different variations in each!

VISIT PHLEARN.COM FOR MORE FREE TUTORIALS

Homepage

SUBSCRIBE NOW FOR MORE FREE TIPS AND TRICKS
http://www.youtube.com/subscription_center?add_user=phlearnllc

GET FREE TUTORIALS SENT TO YOUR EMAIL + DISCOUNTS ON OUR PRO TUTORIALS!
https://phlearn.com/mail

LET’S BE FRIENDS!
Instagram ► https://www.instagram.com/phlearn/
Facebook ► https://facebook.com/phlearn
Twitter ► https://twitter.com/phlearn
Google+ ► https://plus.google.com/116791098059215639405
Phlearn ► https://phlearn.com

How to Color Tone With Apply Image in Photoshop

0

Our #1 PRO Tutorial ever is now on Sale! https://phlearn.com/popular

How to Color Tone Using Apply Image in Photoshop
Apply Image is a very powerful tool when used correctly in Photoshop. Learn how to use Apply Image to color highlights and shadows separately in Photoshop!

What is Apply Image?
The Apply Image command allows you to place a copy of your image on either a layer or layer mask using a variety of blending modes and settings.

When using Apply Image you can choose to apply a single layer or a merged copy of everything you see onto a new layer.

For instance, if you need to liquify your image and need all of your changes on a single layer, you can Apply Image using a Merged copy onto a new layer. This is like taking a snapshot of your photo and sticking it on a new layer!

Apply Image on a Layer or Layer Mask
Apply Image can be used on a layer or layer mask, allowing you to control the visibility of a layer.

A completely white layer mask will make the layer completely visible, and a black layer mask will make the layer invisible.

When applying an image onto a layer mask, the lighter parts of the image will be visible and the darker parts will be invisible.

You can use this method to make a layer only visible in the highlights or shadows of an image, giving you more control over blending.

Color Tone using Apply Image
To Color Tone using Apply Image, create a Color Balance adjustment layer and start by coloring the ‘Highlights’. In this example we add red and yellow to the highlights, giving them a warm feel.

You will notice that the Color Balance layer will effect the entire image. To constrain the Color Balance layer to just the highlights of the image, click on the layer mask and go to Image – Apply Image. Choose a Merged Copy or the Background layer, check Multiply blending mode and then apply the effect.

That layer will now be visible only in the highlights of the image. To reduce visibility even more, simply duplicate the process.

To make a layer only visible in the shadows – click on the layer mask and go to ‘Image – Apply Image’. Choose ‘Merged’ or ‘Background’, click on Multiply and check ‘Invert’. Now the layer will be restricted to just the shadows. To further restrict the visibility of the layer, simply repeat the previous step.

VISIT PHLEARN.COM FOR MORE FREE TUTORIALS

Homepage

SUBSCRIBE NOW FOR MORE FREE TIPS AND TRICKS
http://www.youtube.com/subscription_center?add_user=phlearnllc

GET FREE TUTORIALS SENT TO YOUR EMAIL + DISCOUNTS ON OUR PRO TUTORIALS!
https://phlearn.com/mail

LET’S BE FRIENDS!
Instagram ► https://www.instagram.com/phlearn/
Facebook ► https://facebook.com/phlearn
Twitter ► https://twitter.com/phlearn
Google+ ► https://plus.google.com/116791098059215639405
Phlearn ► https://phlearn.com

How to Use Content Aware Fill in Photoshop

0

Our #1 PRO Tutorial ever is now on Sale! https://phlearn.com/popular

How to Use Content-Aware Fill in Photoshop

Content-Aware fill is a simple way to remove objects from your images. Learn how to remove anything from a photo in a couple of simple steps!

What is Content-Aware Fill?

Content-Aware Fill is located in the Fill dialog ‘Edit – Fill’. Content-Aware fill works by analyzing a photo and filling in a selected area with similar texture and color from the rest of the image.

How to Remove Objects

To remove an object from your photo using Content-Aware Fill, create a duplicate of the background layer by dragging it onto the new layer icon.

Next, select the object you would like to remove using any selection tool. In this example, we use the lasso tool to make a rough selection around the dog in the image. Once selected, go to ‘Edit- Fill’ and choose ‘Content-Aware’ from the drop-down menu.

That’s it! whatever you selected should be gone! If the tool doesn’t do a perfect job, make a new selection and try it again – often times it will do better the second time.

VISIT PHLEARN.COM FOR MORE FREE TUTORIALS

Homepage

SUBSCRIBE TO OUR CHANNEL FOR MORE FREE TIPS AND TRICKS
http://www.youtube.com/subscription_center?add_user=phlearnllc

GET FREE TUTORIALS IN YOUR EMAIL + DISCOUNTS ON OUR PRO TUTORIALS!
https://phlearn.com/mail

BUY THE TABLET AARON USES! https://phlearn.com/tablet

LET’S BE FRIENDS!
Instagram ► https://www.instagram.com/phlearn/
Facebook ► https://facebook.com/phlearn
Twitter ► https://twitter.com/phlearn
Google+ ► https://plus.google.com/116791098059215639405
Phlearn ► https://phlearn.com
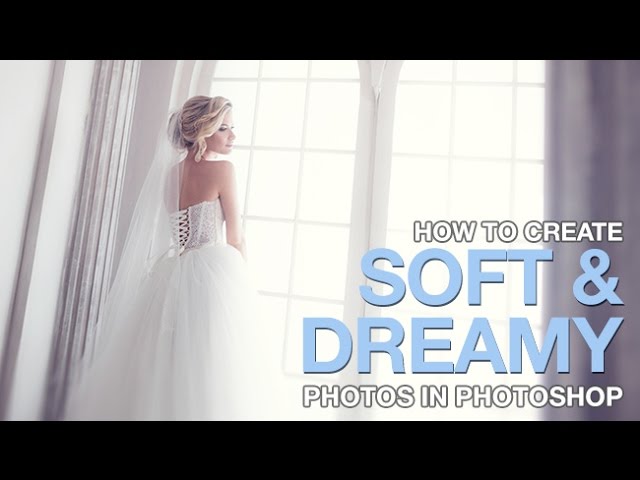
How to Create Soft & Dreamy Photos in Photoshop

0

Our #1 PRO Tutorial ever is now on Sale! https://phlearn.com/popular

How to Create Soft & Dreamy Photos in Photoshop
Take photos to the next level by adding a soft and dreamy look – perfect for weddings, engagements and family photos.

Use Iris Blur to Draw More Attention to the Subject
The soft and dreamy look is done by adding a slight blur to the edges of a photo and adding a soft blur to the light in an image.

To add a slight blur to the edges of a photo, first start by duplicating the background layer and converting it into a smart object by right-clicking on the thumbnail and selecting ‘Convert to Smart Object.”

After converting the layer into a smart object, go to ‘Filter – Blur Gallery – Iris Blur’. In this dialog, you can choose how much blur you would like applied by sliding the blur slider on the right. The controls in the center of the screen allow movement of the blur center, the shape of the blur and feathering.

Choose a subtle blur around the edges of the photo for the soft dreamy look.

How to Make Light Soft & Dreamy
After applying an Iris Blur to the photo, it is time to blur the light only. To begin, create a selection out of the light in the photo by going to ‘Select – Color Range’ and clicking on the light source with the eyedropper tool.

The preview will be white in selected areas and black in non-selected areas. Be sure to adjust the slider to just include the light in the selection.

After turning this area into a selection, create a new layer and either fill it with white or duplicate the selected area from the background. The goal here is to have just the light from the photocopied onto a new layer.

Next, convert the layer with just the light into a Smart Object by right-clicking on it and going to ‘Convert to Smart Object’. We want it to be a smart object so that we can use ‘Smart Filters’. Smart Filters can be changed at any time, making them more versatile than regular filters.

After converting into a Smart Object, apply a blur by going to ‘Filter – Blur – Gaussian Blur’ and choose a radius to expand the light. Adjust the opacity of the layer to suit the image and duplicate it if more of the effect is necessary.

How to Color Tone for the Soft & Dreamy Look
Once the background has been blurred using an Iris Blur and the light has been blurred using a Gaussian Blur, it is time to color tone the image.

In this example, we use a Levels Adjustment layer and edit the Blur Channel – adding more blue to the shadows and yellow to the highlights.

Feel free to play around with color, each photo is different and requires color toning unique to that photo. Most of all, have fun!

VISIT PHLEARN.COM FOR MORE FREE TUTORIALS

Homepage

SUBSCRIBE TO OUR CHANNEL FOR MORE FREE TIPS AND TRICKS
http://www.youtube.com/subscription_center?add_user=phlearnllc

GET FREE TUTORIALS IN YOUR EMAIL + DISCOUNTS ON OUR PRO TUTORIALS!
https://phlearn.com/mail

BUY THE TABLET AARON USES! https://phlearn.com/tablet

LET’S BE FRIENDS!
Instagram ► https://www.instagram.com/phlearn/
Facebook ► https://facebook.com/phlearn
Twitter ► https://twitter.com/phlearn
Google+ ► https://plus.google.com/116791098059215639405
Phlearn ► https://phlearn.com

How to Remove a Scar in Photoshop

0

Our #1 PRO Tutorial ever is now on Sale! https://phlearn.com/popular

How to Remove Scars in Photoshop
Scars are a natural part of life, but they can also attract attention away from your subject. In today’s tutorial, we teach you a fast, easy way to remove scars, so you can create clear skin anytime you want!

How to Correct Light and Dark Skin
The skin around a scar tends to either be lighter or darker than the surrounding skin. To correct for light or dark areas, it can be helpful to view your image in black and white.

To turn an image black and white temporarily – go to ‘Layer – New Adjustment Layer – Black and White’. With color removed, it is easier to correct light and dark areas.

To correct these light or dark areas, create a Curves Adjustment Layer by going to ‘Layer – New Adjustment Layer – Curves’. Fill the layer mask with black to make the layer temporarily invisible by going to ‘Edit – Fill – Black’.

Next, use a soft-edged brush to paint white on the layer mask where the skin needs to be lightened or darkened. You can double-click on the Curves Adjustment Layer Icon to change the curve values at any time. This technique offers a lot of flexibility, so lighten and darken with Curves until the area you painted over top of blends in with the rest of the skin.

How to Color Correct Skin
To correct redness in the skin, first target the red areas. Create a Hue/Saturation Adjustment Layer by going to ‘Layer – New Adjustment Layer – Hue/Saturation’. Next, click on the drop-down menu and change the value from ‘Master’ to ‘Reds’. Any changes will affect all the reds in the image, including the regular skin color.

To refine the red areas, use the eyedropper in the Hue/Saturation Dialog to sample the reds, then use the sliders on the bottom to contract the affected area. To make the changes more visible, increase the Hue and Saturation (temporarily). Then, click + drag the center of the gray slider left and right until you see just the red scar area changing color.

Once the red scar area is targeted, bring the Hue and Saturation sliders back to 0. Move the Hue slider to the right until the red becomes skin color. It may be necessary to lower the saturation and increase lightness to match the skin color completely.

How to Remove the Scar
After correcting for light, dark and colored skin, it is time to remove the scar tissue. The goal is to sample ‘good skin texture’ and replace the ‘bad skin texture’.

Photoshop provides two great tools for the job – The Healing Brush Tool and the Clone Stamp Tool. Press ALT/OPTN + CLICK on the desired skin texture to create a ‘Sample Point’, then paint over the scar to remove it.

We recommend starting with The Healing Brush Tool, then moving onto the Clone Stamp Tool if it doesn’t do the job well on its own.

VISIT PHLEARN.COM FOR MORE FREE TUTORIALS

Homepage

SUBSCRIBE TO OUR CHANNEL FOR MORE FREE TIPS AND TRICKS
http://www.youtube.com/subscription_center?add_user=phlearnllc

GET FREE TUTORIALS IN YOUR EMAIL + DISCOUNTS ON OUR PRO TUTORIALS!
https://phlearn.com/mail

BUY THE TABLET AARON USES! https://phlearn.com/tablet

LET’S BE FRIENDS!
Instagram ► https://www.instagram.com/phlearn/
Facebook ► https://facebook.com/phlearn
Twitter ► https://twitter.com/phlearn
Google+ ► https://plus.google.com/116791098059215639405
Phlearn ► https://phlearn.com
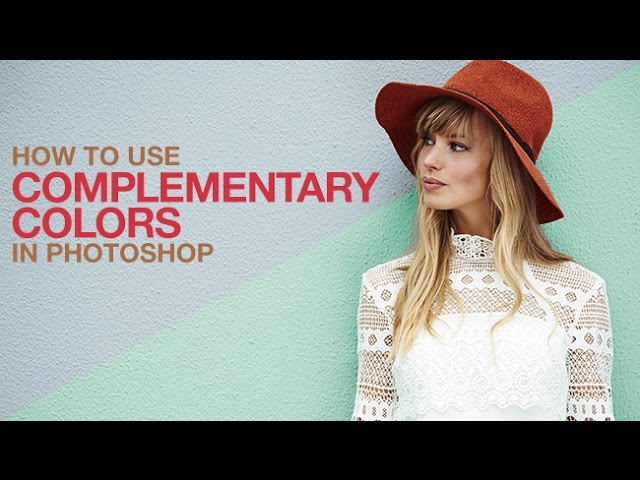
How to Use Complementary Colors in Photoshop

0

Our #1 PRO Tutorial ever is now on Sale! https://phlearn.com/popular

How to Create & Use Complementary Colors in Photoshop
Certain color combinations will always look good together, the most simple color combination being complementary colors. Learn how to identify and create complementary colors, then change the background of a photo to compliment the subject!

How to Use Adobe Color Themes
Complementary colors are opposites on the color wheel. In case you don’t have a color wheel laying around, Adobe has one built-in to Photoshop.

To access the color wheel called “Adobe Color Themes” go to ‘Window – Extensions – Adobe Color Themes’. In this dialog, you can create different color themes including complementary colors, analogous colors, triad colors and more!

To create a complementary color of an existing color in your image, first use the eyedropper tool to sample a color. Then click on the icon below the color wheel in the Adobe Color Theme Dialog labeled ’Set selected color from active color’. This will load the color you just chose using the eyedropper tool into the Adobe Color Theme Dialog. For best results, be sure to have the center color box chosen in the Adobe Color Theme Dialog.

Once the appropriate color is chosen, click on the drop-down menu on the top of the Adobe Color Theme Dialog and navigate to ‘Complementary’. The colors below will now represent a collection of complementary colors.

To retrieve more information on any color, choose it from the 5 available color boxes and note the numbers below. Each color can be identified based on different values. You will see values for CMYK, RGB, HSB, and HEX codes.

These values can be plugged into any color window to accurately match colors.

How to Change Colors in an Image
Now that the appropriate color has been sampled, loaded into the Adobe Color Theme Dialog and a complimentary color has been chosen, it is time to color objects in the photo to represent the complementary colors.

Changing colors in an image can be done in many ways, in this example, we cover 2 methods for coloring an image.

The easiest method is to create a ‘Hue/Saturation’ adjustment layer by going to ‘Layer – New Adjustment Layer – Hue/Saturation’. Click on the ‘Colorize’ button in the Hue/Saturation Dialog, then enter the Hue number from the HSB values on the Adobe Color Theme Dialog.

In this example, we chose a hue of 159, making the background a nice green to compliment the red/brown in the hat.

The last step is to use a layer mask to make the green layer visible over the background and nowhere else. Because the background of the image is one color, we use ‘Select – Color Range’ to select out the background and load the selection into the layer mask.

There are many ways to make selections and masks, feel free to use the method that is most comfortable to you!

VISIT PHLEARN.COM FOR MORE FREE TUTORIALS

Homepage

SUBSCRIBE TO OUR CHANNEL FOR MORE FREE TIPS AND TRICKS
http://www.youtube.com/subscription_center?add_user=phlearnllc

GET FREE TUTORIALS IN YOUR EMAIL + DISCOUNTS ON OUR PRO TUTORIALS!
https://phlearn.com/mail

BUY THE TABLET AARON USES! https://phlearn.com/tablet

LET’S BE FRIENDS!
Instagram ► https://www.instagram.com/phlearn/
Facebook ► https://facebook.com/phlearn
Twitter ► https://twitter.com/phlearn
Google+ ► https://plus.google.com/116791098059215639405
Phlearn ► https://phlearn.com

How to Add Birds to Photos in Photoshop

0

Our #1 PRO Tutorial ever is now on Sale! https://phlearn.com/rtyoutube

How to Add Birds to Photos in Photoshop

Birds can add a bit of whimsy and movement to a photo and adding them couldn’t be easier! Learn how in today’s episode.

How to Select and Mask Birds

The first step to adding birds is finding a photo of flying birds. In this example we use an image from Adobe Stock but you can use any image that suits your needs.

First, make a rough selection around the birds you want to transfer from one image to another. Use the lasso tool to draw a selection around the birds then use the move tool to transfer them to another document.

Next it is time to cut the birds out from their background. The easiest way to do this is by going to ‘Select – Color Range’ and choosing the color of the sky behind the birds. If you need to addd to the selected area, click on the PLUS Eyedropper tool and add more areas of sky.

Keep in mind—dark areas will not be selected, light areas will be selected.

After creating a good selection of the sky, hit ok, and load it as a layer mask on the bird layer. You will need to invert the layer mask which can be done by hitting ‘CTRL/CMD + I’ or going to ‘Image – Adjustments – Invert’.

You should now see only birds on the new background!

How to Color-Correct Birds

Because the birds are surrounded by the blue of the sky, it is important to color correct the birds to fit the new sky.

Duplicate the background layer and place it over the birds and set the blending mode to ‘Hue’. This will bring the color of the sky into the birds and allow everything to blend together!

VISIT PHLEARN.COM FOR MORE FREE TUTORIALS

Homepage

SUBSCRIBE NOW FOR MORE FREE TIPS AND TRICKS
http://www.youtube.com/subscription_center?add_user=phlearnllc

GET FREE TUTORIALS SENT TO YOUR EMAIL + DISCOUNTS ON OUR PRO TUTORIALS!
https://phlearn.com/mail

LET’S BE FRIENDS!
Instagram ► https://www.instagram.com/phlearn/
Facebook ► https://facebook.com/phlearn
Twitter ► https://twitter.com/phlearn
Google+ ► https://plus.google.com/116791098059215639405
Phlearn ► https://phlearn.com