Home Blog Page 520

How to Add Fire in Photoshop

0

Our #1 PRO Tutorial ever is now on Sale! https://phlearn.com/rtyoutube

How to Add Fire in Photoshop

The ability to harness fire separates mankind from all other animals, take it one step further and learn to create digital fire.

How to Render Flames in Photoshop

A new addition to Photoshop CC 2015 brings the power to render flames with a surprising amount of control.

To create flames, first, create a new layer and make a path you want the fire to follow using the Pen Tool. This pen path can mimic that of regular fire or make a shape for special effects.

After selecting the path, go to ‘Filter – Render – Flame…’ Here you can choose from a variety of options to create different types of flames.

We suggest using a reference image to model the flames after. In this example, we add rendered flames to an existing campfire, making it look larger.

How to Make Fire Look Realistic

After rendering flames in Photoshop, convert the flame layer into a smart object. Change the blending mode of the fire layer to ’Screen’ or ‘Lighten’, fire will never make a photo darker.

The flames may benefit from a little blur to make them more realistic. Because we converted the layer into a Smart Object, we can use smart blur filters. Go to ‘Filter – Blur – Gaussian Blur’ and choose a blur radius to match the photo. If you need to change the blur radius at any time, double-click on the filter in the Layers menu and adjust the slider.

VISIT PHLEARN.COM FOR MORE FREE TUTORIALS

Homepage

SUBSCRIBE NOW FOR MORE FREE TIPS AND TRICKS
http://www.youtube.com/subscription_center?add_user=phlearnllc

GET FREE TUTORIALS SENT TO YOUR EMAIL + DISCOUNTS ON OUR PRO TUTORIALS!
https://phlearn.com/mail

LET’S BE FRIENDS!
Instagram ► https://www.instagram.com/phlearn/
Facebook ► https://facebook.com/phlearn
Twitter ► https://twitter.com/phlearn
Google+ ► https://plus.google.com/116791098059215639405
Phlearn ► https://phlearn.com

How to Create a Before/After Animated GIF

0

Our #1 PRO Tutorial ever is now on Sale! https://phlearn.com/rtyoutube

How to Create a Before/After Animated GIF

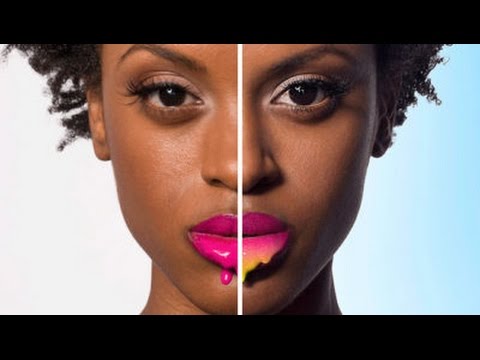
Before/After images are a great way to show off your editing work. Learn how to create a simple animated GIF from any image in Photoshop!

How to Make Before and After Layers

The first step to creating an animated GIF is to get the “Before” and “After” images. In many cases, the “Before” image will be an unedited photo. This will most likely be the background layer of any Photoshop file.

Each change you make to an image should be on a new layer, allowing for changes to be undone at any time. After adding many layers and adjustments to an image, you are left with the “After” version. You will need all these changes to be visible on a single layer to make the “After” Layer.

Create a new layer on the top of the document and navigate to ‘Image – Apply Image’. Choose “Merged”, “Multiply”, and make sure “Invert” is not checked. This will place a copy of your image onto one layer.

This is the “After” Layer.

Duplicate Layers to New Document

After creating the “After” layer, it is time to duplicate the “Before” and “After” layers onto a new document.

Create a new document sized for the web. Image resolution will depend on where this image will live. For instance, if you want this image on Instagram, try a resolution of 1000x1000px.

After creating a new document, select both the “Before” and “After” layers from the original image and Click+Drag them to the new document. Be sure to select both layers when making any adjustments, as you need them to be in the same place.

It is a good idea to turn both the “Before” and “After” layers into Smart Objects before transforming them in the new document. This will allow you to change image size without affecting quality. To turn the layers into Smart Objects, Right-Click on each layer and go to “Convert to Smart Object”.

Select Both layers and transform them into place.

How to Create a Before & After Animation

Now that both the “Before” and “After” layers are sized correctly on the new document, it is time to create a simple animation. Go to “Window – Timeline” to open the animation timeline and click on “Create New Frame Animation”.

Use the “New Frame” icon to make frames from the “Before” and “After” layers. Choose the frame duration and how many times the animation will repeat. In this example, we choose “3 Seconds” and “Forever”.

Be sure to hit the “Play” button to view the animation in the timeline.

Exporting for the Web

After the animation is playing well, it is time to export it to the web. Go to ‘File – Export – Save for Web’ and choose GIF from the drop-down menu.

Be sure to check the animation on the right side of the export panel to see if it is still playing well. When you are satisfied with all the export settings, click the “Export” button and choose a destination folder.

To view the final “Before & After” Animated GIF online, upload it to the desired website or open the image in Google Chrome, Safari or Firefox.

You are ready to show your work off to the world!

VISIT PHLEARN.COM FOR MORE FREE TUTORIALS

Homepage

SUBSCRIBE NOW FOR MORE FREE TIPS AND TRICKS
http://www.youtube.com/subscription_center?add_user=phlearnllc

GET FREE TUTORIALS SENT TO YOUR EMAIL + DISCOUNTS ON OUR PRO TUTORIALS!
https://phlearn.com/mail

LET’S BE FRIENDS!
Instagram ► https://www.instagram.com/phlearn/
Facebook ► https://facebook.com/phlearn
Twitter ► https://twitter.com/phlearn
Google+ ► https://plus.google.com/11679109

5 Photoshop Keyboard Shortcuts for Faster Editing!

0

Our #1 PRO Tutorial ever is now on Sale! https://phlearn.com/rtyoutube

5 Photoshop Keyboard Shortcuts for Faster Editing!

Learning keyboard shortcuts is the best way to work faster and more efficiently in Photoshop. In today’s episode, we explore 5 Keyboard Shortcuts that are sure to speed up your workflow in Photoshop.

Keyboard Shortcuts – Mac

Spacebar + CMD + Click & Drag – Precise Zoom

Use this keyboard shortcut to quickly zoom in and out of specific areas of a photo. Especially great for detailed editing work in Photoshop. Zoom in for detailed work, then zoom-out to see the results.

CTRL + ALT + Click & Drag – Change Brush Size and Hardness

Click & Drag Left and Right to change brush size. Click & Drag Up and Down to change brush hardness.

V, 1-9, 0 – Adjust Layer Opacity

To change layer opacity, first select the Move Tool by pressing “V”. This will make any changes applicable to the layer, not a specific tool like the Brush Tool. Use the numbers on the top of the keyboard to correspond to layer opacity. “1” will make opacity 10%. “5” will make opacity 50%.

OPTN + CMD + SHIFT + M – Add Layer Mask

Learn how to create keyboard shortcuts in this episode. There is no default keyboard shortcut for making a layer mask – we suggest making one to save time!

OPTN + CMD + SHIFT + S – Save for Web and Devices

To save images with the correct settings for display online, be sure to use “Save for Web and Devices”

Keyboard Shortcuts – PC

Spacebar + CTRL + Click & Drag – Precise Zoom

Use this keyboard shortcut to quickly zoom in and out of specific areas of a photo. Especially great for detailed editing work in Photoshop. Zoom in for detailed work, then zoom-out to see the results.

CTRL + ALT + Right-Click & Drag – Change Brush Size and Hardness

Right-Click & Drag Left and Right to change brush size. Right-Click & Drag Up and Down to change brush hardness.

V, 1-9, 0 – Adjust Layer Opacity

To change layer opacity, first select the Move Tool by pressing “V”. This will make any changes applicable to the layer, not a specific tool like the Brush Tool. Use the numbers on the top of the keyboard to correspond to layer opacity. “1” will make opacity 10%. “5” will make opacity 50%.

ALT + CTRL + SHIFT + M – Add Layer Mask

Learn how to create keyboard shortcuts in this episode. There is no default keyboard shortcut for making a layer mask – we suggest making one to save time!

ALT + CTRL + SHIFT + S – Save for Web and Devices

To save images with the correct settings for display online, be sure to use “Save for Web and Devices”

VISIT PHLEARN.COM FOR MORE FREE TUTORIALS

Homepage

SUBSCRIBE TO OUR CHANNEL FOR MORE FREE TIPS AND TRICKS
http://www.youtube.com/subscription_center?add_user=phlearnllc

GET FREE TUTORIALS IN YOUR EMAIL + DISCOUNTS ON OUR PRO TUTORIALS!
https://phlearn.com/mail

BUY THE TABLET AARON USES! https://phlearn.com/tablet

LET’S BE FRIENDS!
Instagram ► https://www.instagram.com/phlearn/
Facebook ► https://facebook.com/phlearn
Twitter ► https://twitter.com/phlearn
Google+ ► https://plus.google.com/116791098059215639405
Phlearn ► https://phlearn.com
How to Add Motion Blur to Backgrounds in Photoshop

0

Our #1 PRO Tutorial ever is now on Sale! https://phlearn.com/rtyoutube

How to Add Motion Blur to Backgrounds in Photoshop

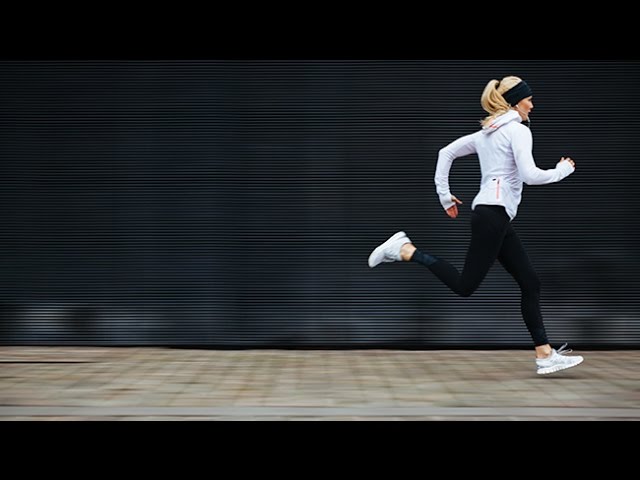
Add depth and movement to photos by adding motion blur to backgrounds. This simple technique will make action and sports photos more dynamic.

Remove the Subject From the Background

When adding motion blur to a photo, it is important to blur only the background. The subject should stay un-blurred to make them stand out from the background.

In order to blur the background and not the subject, the two elements must be separated first. The easiest way to separate the subject and background is to remove the subject from the background.

Create a duplicate of the background layer and use the Spot Healing Brush Tool to remove the subject. Be sure that “Sample All Layers” and “Content Aware” are checked on the top of the screen.

Paint over the subject and the tool will fill them in with information from the background. This doesn’t have to be perfect, after all, you will be applying a blur to the background. The main goal is to make sure the subject is not blurred with the background.

Add Motion Blur to the Background

After removing the subject from the background, turn the duplicate layer into a smart object by right-clicking on the layer and going to “Convert to Smart Object”.

With a Smart Object you can use Smart Filters, and when adding a blur of any kind, it is best to be done as a smart filter. Smart Filters can be changed at any time, making them more versatile and less destructive.

It is time to add the blur to the smart object. The type of blur will change depending on the motion of the photo. In this case, we use a simple “Left-to-Right” Motion Blur because the subject is moving horizontally across the image.

If the subject in your photo is moving towards or away from the camera, choose a Path Blur and create paths in the direction of the movement.

Reveal the Subject

After applying a Motion Blur or Path Blur to the background, it is time to reveal the original subject. Lower the opacity of the layer to about 80% and add a layer mask to the blurred Smart Object. Paint black on the layer mask over the original subject to reveal them through the Smart Object Layer.

Take your time to create an accurate selection around the subject. After completing the layer mask, change the Smart Object layer opacity to 100% and you are done!

To change the amount of blur on the background, double click on the Blur Smart Filter, and adjust the blur amount. The layer mask will stay intact, revealing the subject and provide an instant preview of the background blur with a still subject.

VISIT PHLEARN.COM FOR MORE FREE TUTORIALS

Homepage

SUBSCRIBE NOW FOR MORE FREE TIPS AND TRICKS
http://www.youtube.com/subscription_center?add_user=phlearnllc

GET FREE TUTORIALS SENT TO YOUR EMAIL + DISCOUNTS ON OUR PRO TUTORIALS!
https://phlearn.com/mail

LET’S BE FRIENDS!
Instagram ► https://www.instagram.com/phlearn/
Facebook ► https://facebook.com/phlearn
Twitter ► https://twitter.com/phlearn
Google+ ► https://plus.google.com/11679109

Aaron’s Six Photoshop Tips & Tricks to Increase Productivity

0

Our #1 PRO Tutorial ever is now on Sale! https://phlearn.com/rtyoutube

Photoshop Tips & Tricks to Increase Productivity

Want to work faster and more efficiently in Photoshop? We compiled a list of 6 Tips and Tricks that are sure to boost your Photoshop speed and efficiency!

Photoshop Tips & Tricks

Add More “Undo” States

Photoshop will allow you to go “back in time” through “Undo – CTRL/CMD +Z” and “Step Backward – ALT/OPTN+CTRL/CMD+Z.” Many people find they run out of “Undo States” and can’t go back any further. You can increase the number of times you can “undo” in Photoshop’s preferences.
Open Photoshop Preferences and navigate to “Performance.” Here you will see “History States,” this is the number of times you can “undo.” Increase the slider until you feel comfortable. Keep in mind that with more History States, Photoshop will use more computer resources to store those states.

Quick Export

After editing your images in Photoshop, it is time to post them online. The easiest way to export images for online viewing is through “Quick Export.” To change the Quick Export Settings, go to “Photoshop – Preferences – Export” and adjust the settings to your desired output. In most cases, you will want JPEG, for transparency use PNG, and for animations use GIF.

Increase Performance

The best way to boost Photoshop performance is to add RAM. You can also allow Photoshop to use more of the RAM on your computer by going to “Photoshop – Preferences – Performance.” Here you will see the amount of available RAM and a slider to increase or decrease how much of that RAM Photoshop can use.
Try increasing the slider to 80%-90%. Keep in mind, if Photoshop is using most of the computer’s available RAM, other programs will slow down. For intense editing sessions, close down all other programs and give Photoshop a ton of RAM!

Use Scratch Disks

Once Photoshop has used all the available RAM, it will store temporary information on a “Scratch Disk.” a is a physical drive attached to your computer. You can choose to use the internal hard drive, but it is best to use a secondary drive without an operating system on it. For instance, if you have two internal hard drives, choose the one that doesn’t run the Operating System.
You can also use external drives connected via USB or Thunderbolt. Hard drive speed and connection method will influence Photoshop performance. For best results, use USB 3.0 + or Thunderbolt 2.0 + and a Solid State External Hard Drive or a Raid Array External Hard Drive.

Proper Color Settings

Photoshop offers many options when it comes to Color Space. Some of these Color Spaces are larger than others, allowing you to use more colors when editing. In most cases, you will want to edit with the most colors available. Our suggested Color Space is ProPhoto RGB, which is the largest available color space.
To change Photoshop’s working Color Space, go to “Edit – Color Settings,” and in the “Working Spaces” RGB Dropdown, choose ProPhotoRGB. Be sure to check the boxes in “Color Management Policies” for “Profile Mismatches – Ask When Opening, Ask When Pasting” and “Missing Profiles – Ask when Opening.”

Learn Keyboard Shortcuts

Most of Photoshop’s tools and features can be accessed via Keyboard Shortcuts, and learning these shortcuts can dramatically speed up your editing process. A great way to learn Keyboard Shortcuts is to print them from Photoshop! Go to “Edit – Keyboard Shortcuts,” here you can view the existing keyboard shortcuts and even customize your own.
To print out a list of existing shortcuts, click on the “Summarize” button to save a .HTM file. Open this file in any web browser and print it as a quick-reference guide to keyboard shortcuts in Photoshop!

VISIT PHLEARN.COM FOR MORE FREE TUTORIALS

Homepage

SUBSCRIBE TO OUR CHANNEL FOR MORE FREE TIPS AND TRICKS
http://www.youtube.com/subscription_center?add_user=phlearnllc

GET FREE TUTORIALS IN YOUR EMAIL + DISCOUNTS ON OUR PRO TUTORIALS!
https://phlearn.com/mail

BUY THE TABLET AARON USES! https://phlearn.com/tablet

LET’S BE FRIENDS!
Instagram ► https://www.instagram.com/phlearn/
Facebook ► https://facebook.com/phlearn
Twitter ► https://twitter.com/phlearn
Google+ ► https://plus.google.com/116791098059215639405
Phlearn ► https://phlearn.com
How to Create a Packaging Design Mockup in Photoshop

0

Our #1 PRO Tutorial ever is now on Sale! https://phlearn.com/rtyoutube

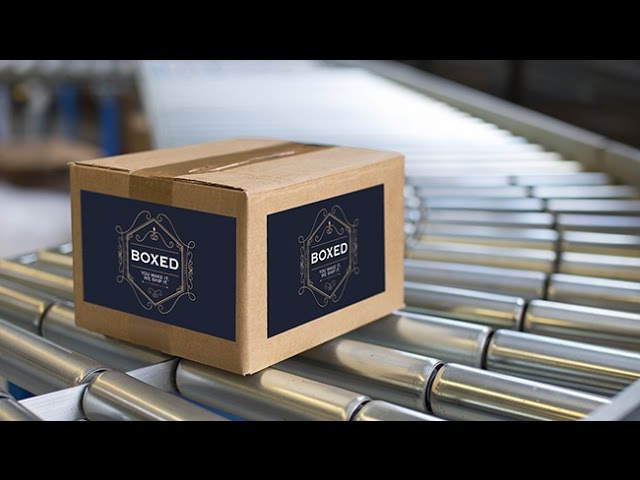
Have you ever wanted to create a mockup of how your graphic design will look on the package it’s destined to be printed on?

Throughout any designer’s life, either for yourself or for a client, you will work on a graphic that needs to be printed out and applied to a physical object.

The hardest aspects of adding text, logos, or graphics to any surface inside a photo is getting the perspective, color, and texture correct. Aaron will guide you through a step-by-step process for making this tedious design task, both easy and phun.

Copy the Logo Onto Your Clipboard

Use Move Tool (V) to drag Logo onto Box document. Transform (CTRL/CMD + T) to make logo smaller, and fit box. Next, copy logo onto clipboard by holding CTRL/CMD and clicking on logo thumbnail to select it, then hitting CTRL/CMD + C to copy the selection to the clipboard.

Make Logo layer invisible and deselect (CTRL/CMD + D). Create a new layer, and on it go to ‘Filter – Vanishing Point’.

Create Perspective Plane

In the Vanishing Point Filter, click on the Create Plane Tool and place a point at each of the four corners of the box. The filter will automatically connect these dots into a perspective grid. Get it as accurate as possible, but don’t worry if it needs fixing – you can edit your points at any time.

Place Logo in Filter

Hit CTRL/CMD + V to paste the Logo (from your clipboard) into the filter. Transform the image (CTRL/CMD + T) to make it the right size for the box. Then, just click and drag it onto the plane, and it will automatically transform into perspective.

To create another plane next to the first one, choose the Create Plane Tool. Click on a side of the first grid, hold CTRL/CMD, and drag out to the end of the box to create your second plane.

Follow the same steps to paste and drag your logo onto this second plane, and it will transform into perspective as well.

Blur the Logo for a More Realistic Look

As a bonus, we cover how to blur the logo so it matches the perspective blur of your photo. Right click on your logo layer and click ‘Convert to Smart Object’, allowing you to use a smart filter.

After the conversion, go to ‘Filter – Blur Gallery – Tilt Shift’, and adjust the settings to make your logos look like they’re blurring into the distance. Since it’s a smart filter, you can go back and change your blur at any time.

And that’s it for creating a packaging design mock-up in Photoshop! It’s a simple way to show your design work in action.

VISIT PHLEARN.COM FOR MORE FREE TUTORIALS

Homepage

SUBSCRIBE TO OUR CHANNEL FOR MORE FREE TIPS AND TRICKS
http://www.youtube.com/subscription_center?add_user=phlearnllc

GET FREE TUTORIALS IN YOUR EMAIL + DISCOUNTS ON OUR PRO TUTORIALS!
https://phlearn.com/mail

BUY THE TABLET AARON USES! https://phlearn.com/tablet

LET’S BE FRIENDS!
Instagram ► https://www.instagram.com/phlearn/
Facebook ► https://facebook.com/phlearn
Twitter ► https://twitter.com/phlearn
Google+ ► https://plus.google.com/116791098059215639405
Phlearn ► https://phlearn.com

How to Make a 3D Extrusion in Photoshop

0

Our #1 PRO Tutorial ever is now on Sale! https://phlearn.com/rtyoutube

How to Make a 3D Extrusion in Photoshop

Prepare Your Images

Start by dragging your logo (or the subject you want to make 3D) onto your image. Then, go to ‘Window – 3D’ to open the 3D workspace. It’s important that your subject is on a transparent background, as this technique will extrude the entire layer.

In the 3D tab of the workspace, choose “Selected Layer(s)” as your source. Select “3D Extrusion” in the bullet list below that, and then hit “Create.”

Working in 3D

Now in 3D View, you should see grid lines around your subject. Go to ‘View – Show’ and make sure 3D Ground Plane, 3D Lights, 3D Selection, and UV Overlay are all selected.

With the Logo layer selected, there are a variety of 3D tools that you can now use: Rotate, Roll, Drag, Slide, and Scale. Rotate allows you to rotate the subject around in all directions in 3 dimensional space. Roll spins the subject around the Z axis. Drag lets you position the subject around the 3D space. Slide zooms the subject closer and farther away from you on the Z axis. And Scale adjusts the size of the subject.

If you click on the Infinite Light option in the 3D tab, you can manipulate the light source as well to change the lighting cast on the subject.

Clicking on the Current View option allows you to adjust the angle you are viewing the subject in.

Properties

In the Properties tab, use the slider to change the extrusion depth – in this case, we want it to be relatively thin. We can also look at shape presets here, which add some 3D detail to the subject. We chose the first one on the second row here.

From the icons on the top of the Properties window, select “Coordinates”. Another way to move and rotate your subject is by changing the number values here. Feel free to explore with this.

In 3D, click “Environment” and return to Properties. You can play around with your subject’s Shadow qualities here.

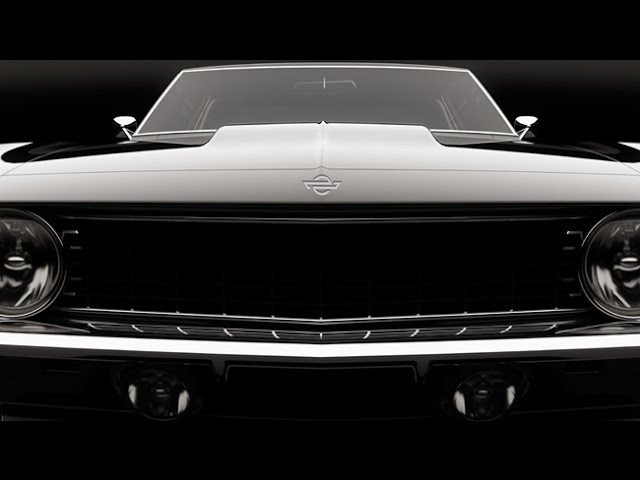
Lying the Logo on the Car Hood

With the Logo layer selected, hop in to Properties and adjust the number values for the X axis to lay the logo on its back. A value of 90 should work. Tap “Move To Ground” if your subject is floating above the grid.

Now that the subject and its shadow are in the right place on the ‘ground’, we simply need to move our camera view until the subject looks like its lying on the car.

Go back to the 3D tab and choose Current View. Click on Properties with Current View selected, and you can adjust the rotation of the current view until it looks just right.

Finishing Touches

Now that you have the tools, you can work on the Lighting and Shadows of the subject until it blends in with the image. Here, the goal is to look pretty realistic.

When you are satisfied with the look, go the ‘3D – Render 3D Layer’, and Photoshop will work to analyze the environment of the object and adjust lighting and details to make the subject fit in as well as possible.

After the wait, you are all set!

VISIT PHLEARN.COM FOR MORE FREE TUTORIALS

Homepage

SUBSCRIBE TO OUR CHANNEL FOR MORE FREE TIPS AND TRICKS
http://www.youtube.com/subscription_center?add_user=phlearnllc

GET FREE TUTORIALS IN YOUR EMAIL + DISCOUNTS ON OUR PRO TUTORIALS!
https://phlearn.com/mail

BUY THE TABLET AARON USES! https://phlearn.com/tablet

LET’S BE FRIENDS!
Instagram ► https://www.instagram.com/phlearn/
Facebook ► https://facebook.com/phlearn
Twitter ► https://twitter.com/phlearn
Google+ ► https://plus.google.com/116791098059215639405
Phlearn ► https://phlearn.com
Learn How to Master Retouching in Photoshop

0

Now on sale! Get your copy here: https://phlearn.com/rtyoutube

You want your images to look beautiful. We all do. What is the point of investing so much time and money in photography, if you can’t produce images that you are proud of? Many of us struggle for hours and hours to retouch one image. If retouching is such an important part of our lives as creative people, we knew there must be a better way to do it.

Phlearn decided to go out and create a more effective process to retouch photos and Retouching 101-301 is the result of that effort. With Retouching 101-301, we believe we have delivered the most comprehensive, effective, and easy-to-follow retouching tutorial ever published.

10 Reasons You Will Love Retouching 101-301:

1. 35 Hours of Education – The longest, most detailed, most comprehensive tutorial Phlearn has ever made.

2. 47 RAW Images Included – A beautiful assortment of brand new images, covering a wide variety of indoor and outdoor shoots.

3. 30 Sections in Total – Skip doing the 10,000 hours of work Aaron has done and just download his brain in this bundle! Aaron will walk you through every retouching technique he has learned one-by-one.

4. Never Before Seen Technique – Aaron has developed a new retouching process he is calling, Luminosity Painting, which we think you will LOVE.

5. Brushes, Actions, and More – Included in your download are multiple retouching brushes, custom actions made by Aaron, and a skin-tone chart!

6. Full Body Retouching – Eyes, lips, mouth, hair, skin, muscles, fat, body position, arm/leg position, etc.. From head-to-toe, Phlearn covers it all.

7. Professional Workflow – From culling your best photos out of the hundreds you took to understanding every tool involved in professional retouching. We will make you a Pro!

8. Master All the Classic Techniques – Dodge & Burn, advanced sharpening, skin tone and color matching, recovering highlights and shadows, HDR, mastering the liquify tool, etc…

9. Creating the Perfect Final Image – Learn to swap heads/arms/legs from multiple images, how to apply digital makeup, how to retouch clothing, how to remove anything from a photo, and much more.

10. Master Frequency Separation – No one has taught frequency separation retouching in the level of detail that Retouching 101-301 does. You will master the technique by the end.

Now on sale! Get your copy here: https://phlearn.com/rtyoutube

3 Steps to Editing Children’s Photos in Photoshop

0

Our #1 PRO Tutorial ever is now on Sale! https://phlearn.com/rtyoutube

VISIT PHLEARN.COM FOR MORE FREE TUTORIALS

Homepage

SUBSCRIBE NOW FOR MORE FREE TIPS AND TRICKS
http://www.youtube.com/subscription_center?add_user=phlearnllc

GET FREE TUTORIALS SENT TO YOUR EMAIL + DISCOUNTS ON OUR PRO TUTORIALS!
https://phlearn.com/mail

LET’S BE FRIENDS!
Instagram ► https://www.instagram.com/phlearn/
Facebook ► https://facebook.com/phlearn
Twitter ► https://twitter.com/phlearn
Google+ ► https://plus.google.com/116791098059215639405
Phlearn ► https://phlearn.com
How to Add a Vintage Film Border in Photoshop

0

Our #1 PRO Tutorial ever is now on Sale! https://phlearn.com/rtyoutube

Learn how to quickly add a vintage film border to any image in today’s episode!

Film Border Stock Images

The first step to adding a vintage film border to any digital photo is to find an image online or scan your own film.

There are many stock photo websites to choose from, in this case, we found the film border on Adobe Stock.

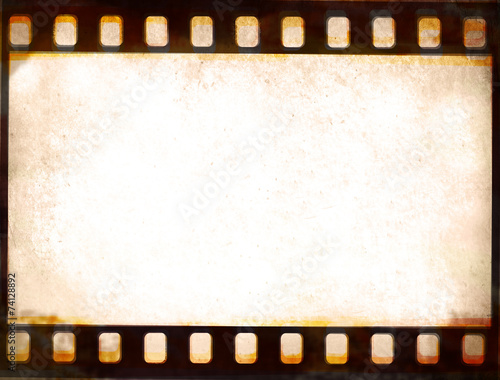
Grunge film strip frame background

Once you have found a stock photo of a film border, open it in Photoshop along with the original image. Place the original image over the film border and resize it so the image only appears in the center of the film border.

Next, double click on the film border to convert it to a regular layer and bring it to the top of the layer stack.

Change the blending mode of the film border layer to ‘Multiply’ to set the effect. Multiply blend mode will make the dark areas of a layer visible and the light areas invisible, allowing the original photo to show through the center.

VISIT PHLEARN.COM FOR MORE FREE TUTORIALS

Homepage

SUBSCRIBE NOW FOR MORE FREE TIPS AND TRICKS
http://www.youtube.com/subscription_center?add_user=phlearnllc

GET FREE TUTORIALS SENT TO YOUR EMAIL + DISCOUNTS ON OUR PRO TUTORIALS!
https://phlearn.com/mail

LET’S BE FRIENDS!
Instagram ► https://www.instagram.com/phlearn/
Facebook ► https://facebook.com/phlearn
Twitter ► https://twitter.com/phlearn
Google+ ► https://plus.google.com/116791098059215639405
Phlearn ► https://phlearn.com